When: Multiple days.
How: First of all I made sure that I fully understood the brief of the Assignment by reading over the text a number of times. As I progressed through the assignment I made notes at each shooting in my daybook in the style of a diary and included in the daybook some drawings and diagrams on some of the concepts that came to mind after reading the text and after looking at some previous photographs I had taken. I will include these notes and concepts in this assignment paper.
I looked at the main qualities for the images detailed in the assignment;
Shape – The outline or edge of the object, minimal detail visible in the object.
Form - The volume of the object, how three dimensional the object looks.
Texture - The quality of the surface detail
Colour - The Objects colour(s)
There is an allowance in the assignment to add in other interesting, unusual or attractive lighting.
In the beginning I experimented with a number of objects, a plain stone statue, a wooden model of a hand, a bottle of bourbon and a metal flask. In each of the experiments I found that I had a number of images which would work well within part of the brief, but were useless for the at one or two of the main parts of the assignment brief. In the end I abandoned all the ideas and after looking at a number of objects in varying lighting conditions, I eventually decided on a glass candle holder.
I then sat down and considered what kind of lighting I could use to create the qualities required in the brief, the glass candle holder had a unique texture, was colourful and was light enough that I could move it around into different lighting conditions and arrangements which would allow me to photograph the qualities I wanted by controlling the light. It also meant that I could sit with the object nearby and have it to hand if I wanted to suddenly experiment with a change of daylight or change in artificial lighting.
I also used Kevin Kertz lighting diagram Photoshop template to allow me to record the setup used when using artificial and photographic lighting.
Shape
1. Shape Number Three.
At first I wanted to reproduce and experiment with an idea I had seen described I a number of years ago which I had then used to photograph a glass object using the method of dark field photography. However I could not find a satisfactory shot which did not appear to be too dark.
This was the third selected image from my attempt to control photographic lighting through the use of a light tent. There was a single diffused flash off to the left of the subject which was further diffused through the white wall of the light tent. The object was sitting on the backdrop cloth of the text and I had turned the light tent around so that the back of the light tent was acting as a black flag soaking up any overspill of light from the flash. On the right hand side of the light tent was a white card reflector to bounce back some of the light for shadow fill. I did not want to make the object too dark as I did not want to lose the overall shape of the object entirely.
Nikon D80, focal length 38.0mm (35mm equivalent 57mm), aperture f19, speed 1/180 , ISO 100, Flash white balance, Pattern Matrix metering, tripod mounted camera, 18-55mm lens, Single flash.
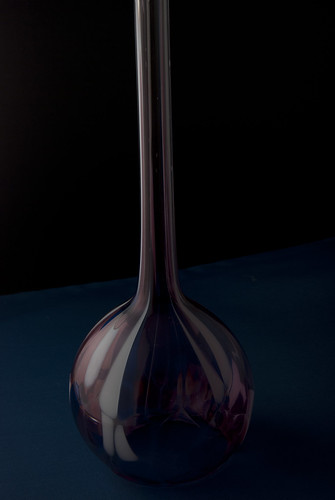
The main idea of the composition was to show the simple shape of the upturned object, showing that the shape flowed from a bowl into a long stem. I wanted to draw the eye upwards through the shape and out the top of the frame. I really wanted the middle of the object to remain black and unfilled by light as I wanted the shape to be split by the darkness.
2. Form Number Three
I really wanted to use daylight for at least on one of by photographs as I wanted to show that I could control daylight as a lighting technique. At first I wanted to use daylight to produce the quality of colour as I knew that the glass object would light up when it was subjected to bright daylight. It was while I was outside waiting for a cloud to pass over that I started to experiment with the subject in non direct daylight. I started at first in complete shade, moving outwards until I was almost in complete daylight. In this image I was just on the border of shade and daylight and when I held the object up into the air I could see that the form of the object was well defined due to the lighting conditions. I went back to my camera and changing the white balance and ISO settings I took the image.
Nikon D80, focal length 46mm (35mm equivalent 69mm), aperture f11.0, speed 1/180 second, ISO 320, Shade White balance, Pattern matrix metering, Hand Held, 18-55mm lens, no flash.
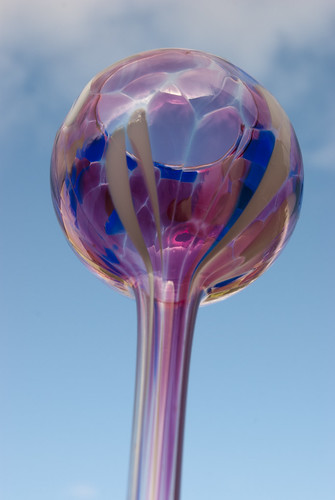
I like the fact that the simple shadow from the other side of the object flows through the shape and that it helps to define the bowl shape at the top of the object. I also like the colours produced and I almost entered this as a colour example, but I preferred the way that the volume of the object is projected.
3. Texture - Monochrome
One of the reasons I had chosen this subject was that the glass itself had quite an interesting texture, not only around the rim, but also over the bowl part where it was ridged and patterned between the colours.
At first I found it quite difficult to capture the texture of the object without using a Macro lens as the pattern was difficult to see in certain lighting conditions. I feel that the colour was detracting from the image and drawing the eye away from the texture and onto the colours and the overall shape. Finally I decided to use artificial light; in this case I used a small torch shining directly at the bowl part of the object. I then took a number of shots with different exposure values, and also using exposure compensation of +/- 1 stop. I then converted all the images to monochrome as I wanted to extract the colour which I felt was detracting the eye.
Nikon D80, focal length 42mm (35mm equivalent 63mm), aperture f19.0, speed 1/180 second, ISO 100, Flash White balance, Pattern Matrix metering, Tripod Mounted, 18-55mm lens, Single light source.
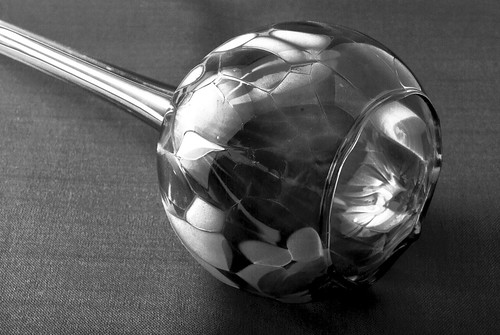
I feel that the final image shows the texture and pattern of the object and shows the definition of its shape as well. I was pleased to see that the light was distorted inside the bowl and has produced a distorted reflection of the light and of the texture.
4. Colour
In the beginning I had wanted to use daylight for describing colour, but as I had produced the image for Form using daylight I decided to have at an attempt at colour using strong photographic lighting.
At first I experimented with having the light direct and above the object but I did not get the colour from the shape that I wanted. In the end I decided to point the studio flash at the white reflected card which I was using as a background; I knew some of the light from the flash would hit the glass object and I knew that the reflected light would bounce straight towards the camera lens through the object if I placed the reflector in the right position.
Nikon D80, focal length 55mm (35mm equivalent 82mm), aperture f32.0, speed 1/180 second, ISO 125, Flash White balance, Spot metering, Tripod Mounted, 18-55mm lens, Single Studio flash.
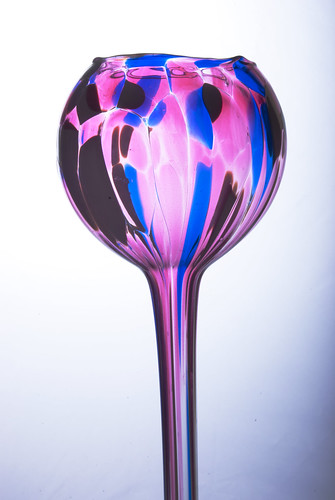
I was pleased to see that the colour just popped out of the white background and that the blues and whites were not overrun by the pink and purple of the object. I was also please to see that the main hue of the object does not vary down the full length of the image.
5. EL Wire
I had a play with this type of lighting previously and I liked the effect that I could produce with it. Here I am using the electroluminescent wire (EL wire) in there different colours pushed up through a hole in the base of the object; the wire I used was coloured, red, white and pink, although when used in this style they are more of a red/orange, white/blue pink/purple. The fact that the white and the pink hues were close to the hues of the object was a pleasant surprise and the red really stood out against the other colours and produced an eye-catching effect.
You can almost see the original hues of the wires as they run up the inside of the stem, but once they intermingle within the main bowl they take on an almost neon effect.
Nikon D80, focal length 55mm (35mm equivalent 82mm), aperture f7.1, speed 1 second, ISO 640, Auto White balance, Spot metering, Tripod Mounted, 18-55mm lens.
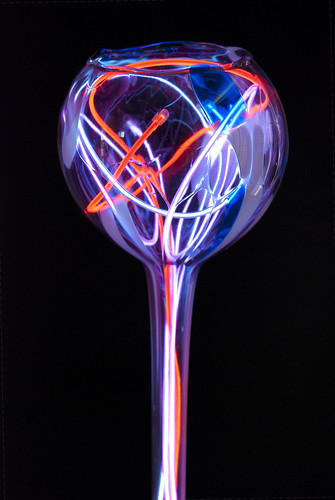
I did not want the bowl too loose its entire colour and become too underexposed so I went for a longer exposure than normal at a higher ISO as I wanted the entire object to be defined not just the wires. In the end I feel that I captured a strange combination of light and shape which I am very pleased with.
6. Form Two
Here I return to the quality of form. This idea was based around the unsuccessful dark field attempts, I just decided to back off a bit and remove some of the more complex parts of the idea and setup and just shoot a straight contrast/shadow fill using one light and a reflector. With a single studio flash with a white umbrella for diffusion on the left of the camera and a white card reflector on the right of the camera I took a couple of shots moving the composition of the subject around until I had it was I wanted it.
Nikon D80, focal length 50mm (35mm equivalent 75mm), aperture f16, speed 1/180 second, ISO 125, Flash White balance, Pattern Matrix metering, Tripod Mounted, 50mm lens.
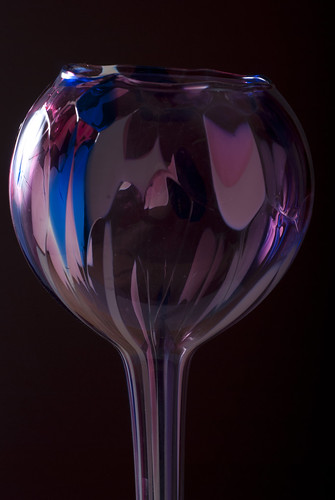
Using the 50mm prime lens allowed me to move in quite close to the subject and I relied on having the room in partial darkness to soak up some of the overspill light from the flash. While I am quite pleased with the final image and it defines the form of the object it was not the “first chosen” image but I wanted to see and to show that I could capture the quality of form using artificial light and with some experimentation on fill.
7. Candle
As the object was originally designed to hold a small candle, i felt that it was an injustice not to attempt at least one image where the object was light up using only candle light. I had to play around for a while to find a way that I could safely balance the object while getting above it to photograph it. I did not want to get too close for fear of burning either myself or the camera!
In the end I pushed the stem into a cardboard box and balanced the whole thing on a table. Under the box and extending off into a background in a large piece of black card as I did not want any reflected light coming back up into the stem or into the bowl. I just wanted to capture the light from the top as it shone out through the object.
Nikon D80, focal length 52mm (35mm equivalent 78mm), aperture f5.6, speed 1/30 second, ISO 640, Auto White balance, Spot metering, Tripod Mounted, 18-55mm lens.
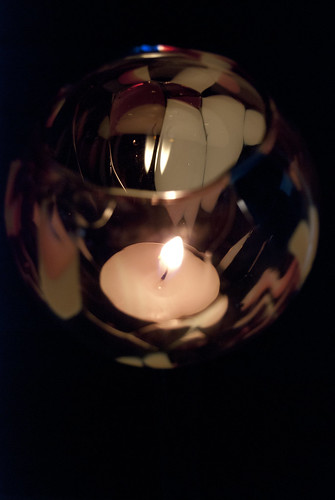
In this case I had to plump for Auto White balance as I felt that both shade and overcast weather white balances did not produce the right hues. As it was I not had time for a two shots before the whole thing toppled over and almost set fire to the black card and a chair. At this point I abandoned the idea of taking further shots.
I am happy with the composition and colours within the image as I feel that it gives a good representation of the colours that the candle light produced.
8. Texture 2
I had been experimenting with a Macro lens with a ring flash on it and had produced some up close images of the texture of the glass. However I felt that the final colour of the image was being overcast by the colour of the object. I went out and obtained a large piece of yellow card and placed this behind the object. I then removed the ring flash from the front of the lens and set the camera up on a tripod. This allowed me to turn on the artificial light in the room and I decided to work by the tungsten light instead of using flash.
Nikon D80, focal length 105mm (35mm equivalent 157mm), aperture f19, speed 10 second, ISO 125, Tungsten White balance, Spot metering, Tripod Mounted, 105mm macro lens.
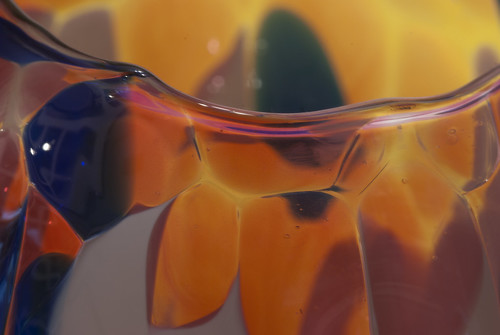
I again went for a long exposure as I wanted to capture the leaf like texture of the object and I wanted the yellow top break up the pinks and purple hues and make it more flower like in its shape and definition.
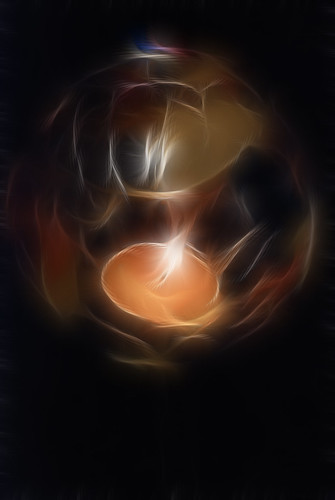
Additional Images – Fractal Candle
I am not sure that this can be a genuine submission as in this case the light was then enhanced in post production using a mathematical algorithm to distort the paths of the light. However I liked the image.
Summary
I have found this assignment a bit of a challenge to start with as I just could not find the right object. Once I had the right object then I feel things became better and I was able to freely experiment with differing lighting conditions and situations and take multiple images under these conditions. I also feel that I made the right choice straight away for some of my ideas and the lighting conditions just fell together and that I had full control of the light.
At the end of the assignment I have however started to re-examine the world around me for the way that lighting has an effect on shape, colour and definition of everything around me. I feel that I can now produce better images than before as I finally understand what is happening to the light around me and how that interacts with the camera lens. This part of the course has also reinforced the primary and secondary colours as well as composition as at times I had to move the subject around or move myself around to improve the final image. One of the main things to come out of this part of the course is that I now feel that I do not make enough notes and that I am going to have to try harder to make more complete notes as I think this can hold me back sometimes.
No comments:
Post a Comment