As I was going to be immobile for a while after my surgery, I asked on the Flickr/OCA forum what I should be doing as I was going to be stuck somewhat like a Hitchcock character in “Rear Window”. It was suggested that I watch “The genius of Photography” and read some suggested titles.
Luckily I had been given a copy of the DVD “The Genius of Photography” just a few days before my operation and so far I have watched the first episode fully and part of the second episode.
I have had further success with the books.
Sontag on Photography – Susan Sontag
Ways of Seeing – John Berger
Photo Icons Volume 1 – Taschen
Edward Weston – Taschen
Photography a very short introduction – Steve Edwards
Sontag on Photography is a collection of essays and ideas from Susan Sontag regarding photographic theory, photographers themselves and the photographic way of seeing. Sontag puts for a number of good ideas and theories within the essays. I found them a little unstructured and at times I found that they almost contradicted themselves from chapter to chapter. However the book was very informative and it introduced come new concepts and language of art that I had not understood up until that point. One of the essays considers the work of Edward S Curtis who created a collection of photographs as a record for society on the passing of the ways of life of the Native American, showing that photography was acting both as a method of recording, a statement on the passing of a way of life, a collection of photographs and an artistic statement.
One of the collections of essays I did really enjoy was on the way of seeing and the artists/photographers eye, these essays contain a lot of philosophy and ideas that I now start to think of when I am even considering the basic ideas of composition.
I had started reading “Ways of seeing” in parallel with Sontag on Photography and found that both authors carry the same message regarding the ability to see and think as an artist and as a photographer and that photography should be treated as an art in its own right. I did find that “Ways of seeing” was easier to read as it combined full text chapters with chapters of nothing but photographs and a combination of both. The simple fact that it allows the reader space and time to examine their own concepts and thoughts and to show that art is open to everyone made it a good book that I could dip in and out of when I was able.
Photo Icons Volume 1 contains a small number of iconic photographs which have been picked for their historical and artistic influence in photography. At first flicking through the book I was unaware of the differing styles that the book would show and I was surprised to see that the collection of photographs were each documented fully covering both the photographer, their artistic and historical place and then examining the photograph in question. I especially liked the little side history giving the full life of the photographer and what their main influences were. These small hard back books were surprisingly cheap and very interesting. From looking at these books I bought books on Edward Weston, Edward S Curtis, Karl Blossfedt, Man Ray and Henri Cartier Bresson.
I am particularly fond of the still life work of Edward Weston, his simple monochromatic images of peppers have a striking use of dark and light which reminds me of the paintings of Diego Rivera as they are stunning in their simplicity. His ability to enhance his subject through the use of light is fascinating and his images of shells are almost impossible to describe for their complexity, I feel that his images almost shine with an inner light. The book has a selection of his images and a short life history on Weston himself.
I read “Photography a very short introduction” as it was required reading for a day course in photography that I took a Edinburgh University just last week. The book quickly covers photographic history and then goes on into photographic theory and concepts; including compositional structure and the differing types of photography concentrating mainly on the difference between art photography and documentary photography. I found that the book was a small handy size and that I could stick it in a jacket pocket and read it when I had the time as the chapters were short and simple. The chapter on perspective within composition was very clear and it clearly defined the differing styles of perspective composition which until now I had never considered.
Tuesday, 24 August 2010

Monday, 23 August 2010
Exercise 22
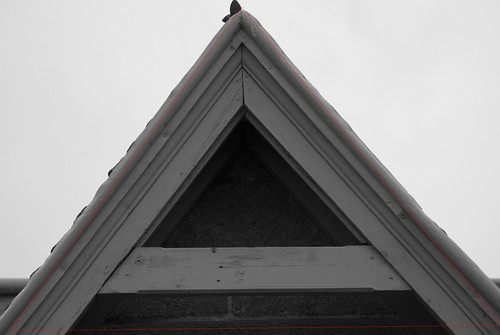
What: The brief of this exercise was to examine and produce two sets of triangular compositions, one using real triangles and one using implied triangles.
Where: Various Locations
When: All times of the day, sunny, rain and dull weather.
How: I did find this exercise quite difficult in two ways; the first problem is that I have not regained full mobility and after a surgical procedure I was unable to climb stairs, walk distances, etc. This had an effect in that I could not travel to some of my subjects and when I got there I could not always find a way of obtaining a suitable location or perspective. I found this quite frustrating and at times I was quite concerned that I would be unable to complete this exercise.
The second problem was that I just made a dyslexic mistake and misunderstood the brief of the exercise and made a basic mistake in how I was to photograph using perspective. It was not until I was writing up my notes that I realised what a mistake I had made.
Since starting this part of the course I have started to “see” shapes in all sorts of locations and structures. This has been a real surprise and has made part of these exercises quite fun as I point out shapes and forms.
Real triangles
Brief: Find a subject which is in itself triangular.
I did find this difficult stuck inside as there were not a lot of triangular things that I could get to easily. It was only once that I had gained some mobility that I was able to move about outside. I quickly spotted this triangular shape at the top of a window in a nearby building. It was quite easy to photograph and have it as the main item in the frame.
D80,Aperture f/6.6, Shutter Speed 1/400 sec, ISO 400, 210mm (35mm equivalent 315mm), Pattern Metering Mode, Auto White Balance, Aperture Priority, Hand Held, VR lens.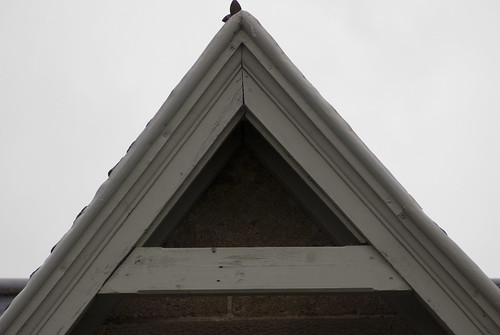
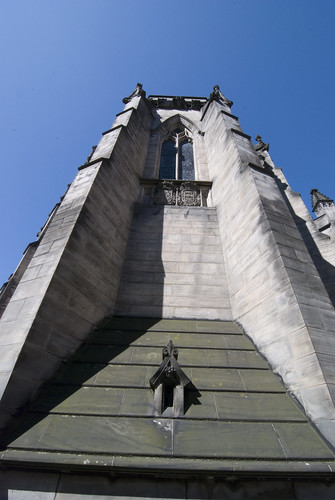
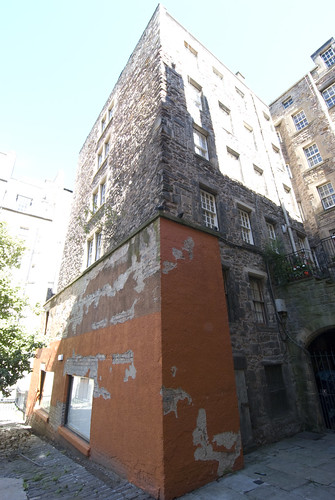
Brief: Make a triangle by perspective (top).
This was quite easy to do, with a wide angle lens it is quite easy to position a subject in such as way that it converges towards the top of the frame.
D80,Aperture f/14.0, Shutter Speed 1/50 sec, ISO 400, 11mm (35mm equivalent 16mm), Pattern Metering Mode, Auto White Balance, Hand Held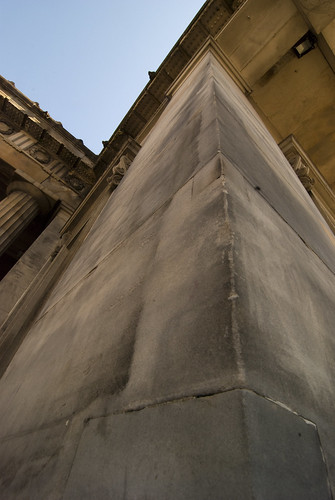
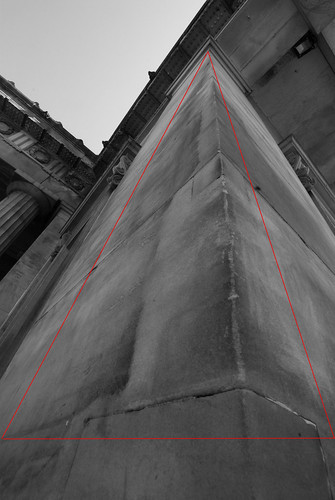
I produced a number of this type of perspective triangle, I have uploaded them into my Flickr pages so that they would also be available to view.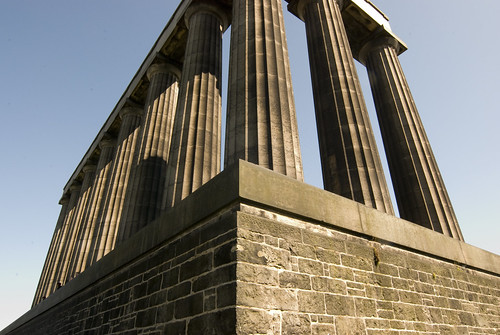
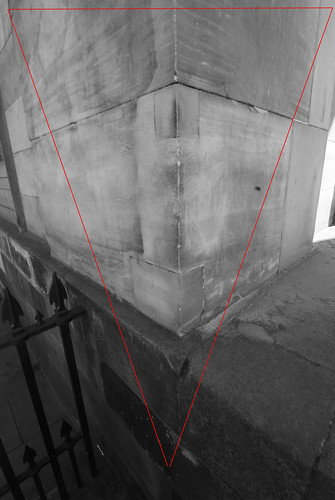
Brief: Make a triangle by perspective (bottom).
This was not quite as easy to do as I thought, as in a lot of the locations I found there was no good way to photograph the subject which would produce a triangle by perspective where it would converge towards the bottom of the frame. This gave me a lot of frustration and it was not until we were making our way back from an unsuccessful shoot of another subject that I managed to take this shot.
D80,Aperture f/14.0, Shutter Speed 1/40 sec, ISO 400, 11mm (35mm equivalent 16mm), Pattern Metering Mode, Auto White Balance, Hand Held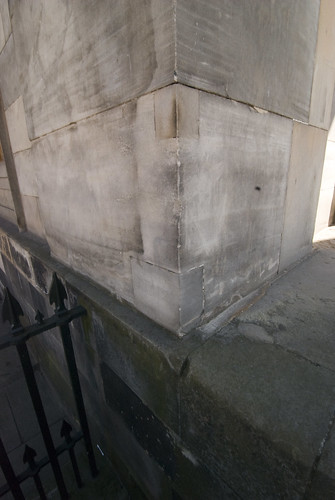
Implied Triangles
Brief: Make a still life arrangement to produce a triangle with the apex at the top
I had a bit of fun with this as I was stuck inside and with limited movement I could take my time and experiment with different styles of still life arrangement. I used almost the same items for this still life arrangement as the next brief where the apex is at the bottom.
D80,Aperture f/29.0, Shutter Speed 1/60 sec, ISO 800, 65mm (35mm equivalent 97mm), Pattern Metering Mode, Auto White Balance, Tripod Mounted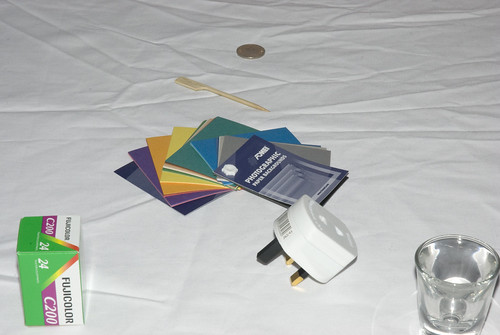
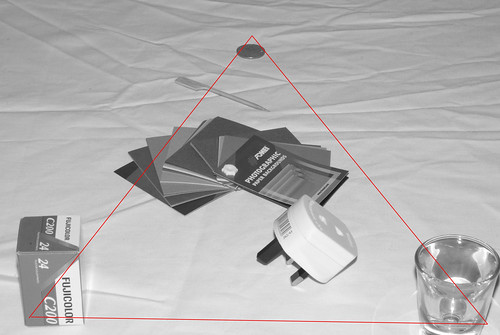
Brief: Make a still life arrangement to produce a triangle with the apex at the bottom.
D80,Aperture f/29.0, Shutter Speed 1/60 sec, ISO 800, 65mm (35mm equivalent 97mm), Pattern Metering Mode, Auto White Balance, Tripod Mounted
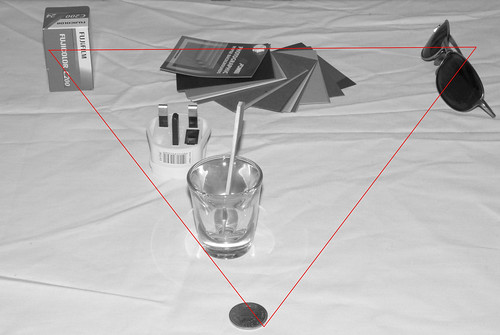
Brief: Arrange three people in a group picture in such a way that either their faces or the lines of their bodies make a triangle.
D80,Aperture f/4.5, Shutter Speed 1/60 sec, ISO 100, 52mm (35mm equivalent 78mm), Pattern Metering Mode, Auto White Balance, Tripod Mounted, Flash Fired.
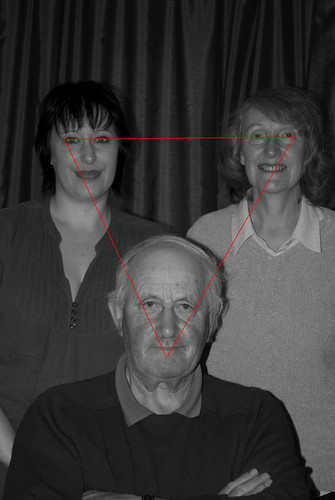
On the whole, although limited in what I could do and shoot I enjoyed the exercise and it has helped me understand triangular perspective and the vanishing point.
It has also helped me understand that triangles and thei use in composition and that they can be of help or hinder a composition.
Monday, 19 July 2010
Exercise 21
What: The brief of this exercise was to first examine the two photographs in the study guide and find and note the implied lines. Then take three recent photographs of my own and perform the same analysis on the photographs. The final part of the exercise was to plant and take two photographs that use eye-line and extensions of lines or lines that point.
Where: Various Locations
When: All times of the day, sunny, rain and dull weather.
How: The first two parts of the exercise were quite straight forward, the photographs in the study guide show flowing lines which lead and flow and create a tension within the image itself.
The turning of the matador as he sweeps the cape out the way of the bull, while the bull itself moves deeper into the frame as it charges past the matador.
The farmer in the second image is quite static while the movement of the horses towards the viewer guides the eye back into the frame and back to the farmer. The slight tilt in the horizon magnified by the foreground which tilts and curves helps to create the tension within the image and to keep the eye moving.
The three images I chose also demonstrate implied lines and these I have marked with an arrow.
Implied Line – Drop and Curve
D80,Aperture f/14.0, Shutter Speed 1/160 sec, ISO 250, 105mm (35mm equivalent 157mm), Pattern Metering Mode, Auto White Balance, Tripod Mounted.
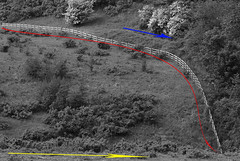
I quite like the curved line that the fence creates as it crosses the frame and the drops off to the right hand corner. The foreshortening caused by the telephoto lens flattens the fence into background making at almost 2 dimensional.
Implied Line – Off to Left
D80,Aperture f/22.0, Shutter Speed 1/25 sec, ISO 100, 11mm (35mm equivalent 16mm), Pattern Metering Mode, Auto White Balance, Tripod Mounted.
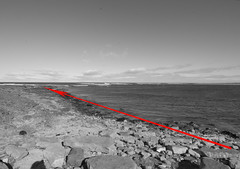
The line of the stones on the beach effectively act as an implied line, moving off into the frame. This is such a simple example of an implied line that I missed it the first time. It was only when examining the image that I saw this implied line on the beach made out of the stones.
Implied Line- Curved Rotation
D80,Aperture f/4.5, Shutter Speed 1/60 sec, ISO 500, 105mm (35mm equivalent 157mm), Pattern Metering Mode, Auto White Balance, Tripod Mounted.
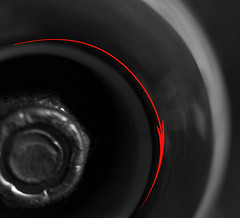
The blurred text on the spinning wheel indicates movement and also implies the directionality of the wheel. This implies a curved line within the movement.
The final part of the exercise I found quite difficult, as I believe I was over analysing the exercise. This combined with being housebound meant that I struggled to find examples of eye lines and extension/leading lines. However I finally overcame this and planned four photographs;
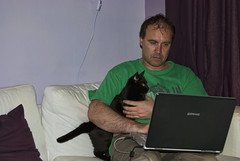
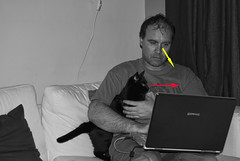
1. Looking at book. The main plan of this photograph was to create an eye line with me looking down reading a book. After sketching the idea, I then setup a camera on the tripod and using a computer controlled timer (DIYPhotobits camera control) I was able to take a number of photographs and then choose the one which demonstrated the eye line the strongest, the rest of the photographs either were badly framed or I was not looking at the book.
I also like the idea that the cat has a different eye line within the same frame.
Yes, I really am that horrible colour just now!
D80,Aperture f/5.6, Shutter Speed 1/125 sec, ISO 125, 52mm (35mm equivalent 78mm), Pattern Metering Mode, Auto White Balance, Tripod Mounted.
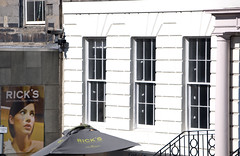
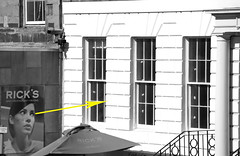
2. Ricks Bar. I noticed this sign out of the corner of my eye as I passed the top of the street that the bar is on. At a certain position, the eyes on the poster were no longer just gazing into space, but were in fact studying the windows of the empty office above it. I took a photograph from a number of positions, but I was happiest with one I took from halfway up a fight of steps across the street. I preferred the framing and the eye line of this photograph. I quite enjoyed capturing this image.
D80,Aperture f/10, Shutter Speed 1/320 sec, ISO 125, 155mm (35mm equivalent 232mm), Pattern Metering Mode, Auto White Balance, Hand Held.
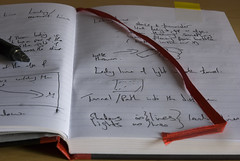
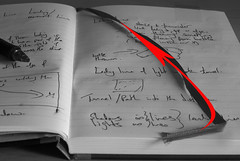
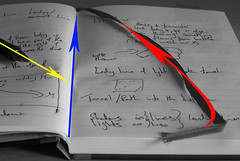
3. Ribbon on book. It was while I was making sketches and notes in my daybook that I realised that the ribbon could be used to create an extension of a line and an line that points. I setup the camera on a tripod and shot this image as the book was sitting open on a table top. I wanted a reasonable close image of the ribbon, so I decided not to capture the whole page of the book, but to get in as close as possible with my framing without losing the knowledge that it was a book.
D80,Aperture f/16, Shutter Speed 0.4 sec, ISO 500, 70mm (35mm equivalent 105mm), Pattern Metering Mode, Auto White Balance, Tripod Mounted.
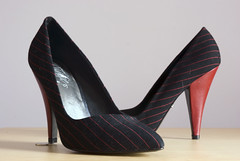
4. Shoes. I noticed a similar photograph in one of my photography books and I decided I would like to make my own homage to the photograph as I felt that it had a number of sweeping lines which created a tension within the image and that guided the eye around the scene. In this case the eye is guided up the shoes by the extension of the line from the curved front of the shoe and also by the red lines on the pattern of the shoe and eventually down to the coin.
D80,Aperture f/16, Shutter Speed 2.5 sec, ISO 500, 48mm (35mm equivalent 72mm), Pattern Metering Mode, Auto White Balance, Tripod Mounted.
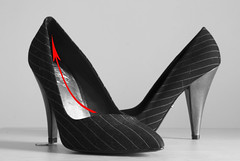
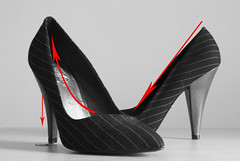
I have learned a lot in this exercise, first of all that I should not over analyse the exercise because if I do then I will never complete the exercise or the course. I have learned to break down the ideas into simple guideline and then to work up from there.
I have earned the use of eye-lines in composition, and that they can be used to either guide the viewers’ eye or to help the viewer see the smaller parts of the composition. I have also learned that there are implied lines in almost all of my images and that they must be considered during composition as they have an effect on how an image is viewer and how the viewer eye can be drawn away from the subject instead of towards the subject.
I have learned that lines can be used to emphasis a small part within the frame by using a line to directly point to it or by guiding the eye along the extension of a line.
I have learned about lines and how by creating tension within a frame by using a line then the dynamic tension of the line will move the viewers eye back onto the frame to see more.
Where: Various Locations
When: All times of the day, sunny, rain and dull weather.
How: The first two parts of the exercise were quite straight forward, the photographs in the study guide show flowing lines which lead and flow and create a tension within the image itself.
The turning of the matador as he sweeps the cape out the way of the bull, while the bull itself moves deeper into the frame as it charges past the matador.
The farmer in the second image is quite static while the movement of the horses towards the viewer guides the eye back into the frame and back to the farmer. The slight tilt in the horizon magnified by the foreground which tilts and curves helps to create the tension within the image and to keep the eye moving.
The three images I chose also demonstrate implied lines and these I have marked with an arrow.
Implied Line – Drop and Curve
D80,Aperture f/14.0, Shutter Speed 1/160 sec, ISO 250, 105mm (35mm equivalent 157mm), Pattern Metering Mode, Auto White Balance, Tripod Mounted.
I quite like the curved line that the fence creates as it crosses the frame and the drops off to the right hand corner. The foreshortening caused by the telephoto lens flattens the fence into background making at almost 2 dimensional.
Implied Line – Off to Left
D80,Aperture f/22.0, Shutter Speed 1/25 sec, ISO 100, 11mm (35mm equivalent 16mm), Pattern Metering Mode, Auto White Balance, Tripod Mounted.
The line of the stones on the beach effectively act as an implied line, moving off into the frame. This is such a simple example of an implied line that I missed it the first time. It was only when examining the image that I saw this implied line on the beach made out of the stones.
Implied Line- Curved Rotation
D80,Aperture f/4.5, Shutter Speed 1/60 sec, ISO 500, 105mm (35mm equivalent 157mm), Pattern Metering Mode, Auto White Balance, Tripod Mounted.
The blurred text on the spinning wheel indicates movement and also implies the directionality of the wheel. This implies a curved line within the movement.
The final part of the exercise I found quite difficult, as I believe I was over analysing the exercise. This combined with being housebound meant that I struggled to find examples of eye lines and extension/leading lines. However I finally overcame this and planned four photographs;
1. Looking at book. The main plan of this photograph was to create an eye line with me looking down reading a book. After sketching the idea, I then setup a camera on the tripod and using a computer controlled timer (DIYPhotobits camera control) I was able to take a number of photographs and then choose the one which demonstrated the eye line the strongest, the rest of the photographs either were badly framed or I was not looking at the book.
I also like the idea that the cat has a different eye line within the same frame.
Yes, I really am that horrible colour just now!
D80,Aperture f/5.6, Shutter Speed 1/125 sec, ISO 125, 52mm (35mm equivalent 78mm), Pattern Metering Mode, Auto White Balance, Tripod Mounted.
2. Ricks Bar. I noticed this sign out of the corner of my eye as I passed the top of the street that the bar is on. At a certain position, the eyes on the poster were no longer just gazing into space, but were in fact studying the windows of the empty office above it. I took a photograph from a number of positions, but I was happiest with one I took from halfway up a fight of steps across the street. I preferred the framing and the eye line of this photograph. I quite enjoyed capturing this image.
D80,Aperture f/10, Shutter Speed 1/320 sec, ISO 125, 155mm (35mm equivalent 232mm), Pattern Metering Mode, Auto White Balance, Hand Held.
3. Ribbon on book. It was while I was making sketches and notes in my daybook that I realised that the ribbon could be used to create an extension of a line and an line that points. I setup the camera on a tripod and shot this image as the book was sitting open on a table top. I wanted a reasonable close image of the ribbon, so I decided not to capture the whole page of the book, but to get in as close as possible with my framing without losing the knowledge that it was a book.
D80,Aperture f/16, Shutter Speed 0.4 sec, ISO 500, 70mm (35mm equivalent 105mm), Pattern Metering Mode, Auto White Balance, Tripod Mounted.
4. Shoes. I noticed a similar photograph in one of my photography books and I decided I would like to make my own homage to the photograph as I felt that it had a number of sweeping lines which created a tension within the image and that guided the eye around the scene. In this case the eye is guided up the shoes by the extension of the line from the curved front of the shoe and also by the red lines on the pattern of the shoe and eventually down to the coin.
D80,Aperture f/16, Shutter Speed 2.5 sec, ISO 500, 48mm (35mm equivalent 72mm), Pattern Metering Mode, Auto White Balance, Tripod Mounted.
I have learned a lot in this exercise, first of all that I should not over analyse the exercise because if I do then I will never complete the exercise or the course. I have learned to break down the ideas into simple guideline and then to work up from there.
I have earned the use of eye-lines in composition, and that they can be used to either guide the viewers’ eye or to help the viewer see the smaller parts of the composition. I have also learned that there are implied lines in almost all of my images and that they must be considered during composition as they have an effect on how an image is viewer and how the viewer eye can be drawn away from the subject instead of towards the subject.
I have learned that lines can be used to emphasis a small part within the frame by using a line to directly point to it or by guiding the eye along the extension of a line.
I have learned about lines and how by creating tension within a frame by using a line then the dynamic tension of the line will move the viewers eye back onto the frame to see more.
Saturday, 3 July 2010
Further Reading –Ian Jeffrey - How to Read a Photograph
I have started this large thick book with some trepidation as it appeared to start with to be a technical tome of a book. However it is a very accessible and practical book. I’m only a small part way through the book however and I have found it to take quite a European stance on photography almost ignoring the early photography being pioneered in American . The style of the book makes it easy to read and which so far has been educational and refreshing.
Some of the photographers so far that I have read about are
- David Octavius Hill & Robert Adamson
These two Scottish Edinburgh based photographers were quite a surprised to me; I had never heard of these photographers before and these two very early pioneers impressed me.
I found their portraits to carry a massive range of contrast and highlights in the colours of their dark monochrome images. The formal posed portraits of both the Edinburgh notables and the fisher folk of Newhaven all carry an intensity within the image, that I feel at times that I am looking at a portrait painted by Rembrandt.
- Wilhelm Von Thoma
What impressed me the most about the work of this German photographer is the range of styles he covered. He moved from formal portraiture, recording for posterity people, to taking war photographs which are open to interpretive analysis.
At the start of the Great War he was recording the formal posed groupings of aristocratic German Pilots and he slowly moved through photographs capturing and recording people and their moments in time , through informal loosely posed portraits to recording the brutality of war both on the landscape and more importantly on people fighting in the war. Unlike the posed formal portraits from the American Civil war and Roger Fentons Crimean war photographs, which records the landscape after the battle (but which I feel ignores the brutality of the battle) ; Von Thoma shows what the war was doing to soldiers, pilots and the landscape, both at the front line and further behind. This style of war photography would really not be seen again until Robert Haeberle and Don McCullins’ photographs from the Vietnam war.
I feel that Von Thoma in his relaxed portraits and front line war images was moving away from a method of just recording that moment in time and opening the photograph up for interpretation for the viewer
- August Sander
On first viewing of Sanders "Herdsman" you may think that this photograph was taken at the latter end of the 20th Century. In fact this modern, interpretive informal portrait was taken in 1913. The posing, colour, contrasts and definition of the image show that Sander had taken his time in creating this photograph. This photograph was just one of the many eye catching photographs that Sander took for his book “Face of our time” which established Sanders’ reputation. The book with its empathic one to one relationships with the viewer caught the attention of the National Socialist authorities seized the books and destroyed the printing plates; they may have interpreted Sanders photographs and book as a satire of their policies. His later work may have been influenced by Beckman and Raderschiedt as his portraiture is in the modernist style of the times and is both impassive and poignant in detail.
- Alexander Rodchenko
Rodchenko was already an establish artist when he took up photography, he was quick to experiment with differing styles and his influence on photography itself is mainly due to his influence on the elements of design. As an illustrator he was already experimenting with photomontage and the skills he learned producing adverts and posters and he used these skills when composing his photographs. He quickly demonstrated his ideas and his Constructionist style of photography in images such as the “Workers Facility Student” where this portraits shows the head and neck of a smiling young man on a divided black and white background. The student portrayed has his had perched on the back of his head and its multiple sided shape frames his face. The students smile frames his mouth repeating the shape of the hat and it subdivides his face. His “Pioneer Girl” its point of view upwards towards the subject is in the European neoclassical style and shows a symmetrical figure almost like a statue. Rodchenko used these elements of design frequently; the repetition of shape, pattern or form and differing angles for point of view. I feel that he was trying to move away from the formal way of taking photographs and experiment with ideas and expressions within his photography.
Sunday, 13 June 2010
Exercise 20
What: The brief of this exercise was to locate and photograph subjects which demonstrated strong curves which emphasised movement and direction.
Where: Various Locations inside and outside
When: All times of the day, sunny, rain and dull weather.
How: I had a good think about what subjects would be good for curves, as I live in an area dominated by late 1950’s early 1960’s architecture which is mainly all strong straight lines everywhere. As in the last few exercises I made a few notes and drawings to get the ideas clear in my head, again on visited some of the sites and photographing some of the ideas either they just did not work or that they failed to express the concept.
I mainly relied on one camera on this exercise and some of the photographs were taken where the camera was handheld as this gave me the freedom of movement and others were tripod mounted to give me the time to compose the image.
Curved Bridge.
D80,Aperture f/4.5, Shutter Speed 1/1600 sec, ISO 250, 62mm (35mm equivalent 93mm), Pattern Metering Mode, Auto White Balance, Tripod Mounted.
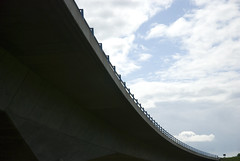
This is a relatively new piece of road built in the last 15 years or so. It actually crosses over an old sheep drover’s road and over the river both of which are in the valley below it. The bridge curves to bring two pieces of road together on either side of the valley and it swoops down and over the point of view from the drovers’ road below.
I decided to reshoot an old photograph that I had taken years ago, when I had first started using a DSLR. I have always liked the abstract curves and colour reflections that this shot creates
Fish in a Tube
D80, Aperture f/5, Shutter Speed 1/40 sec, ISO 500, 56mm (35mm equivalent 84mm),Pattern Metering Mode, Auto White Balance, Hand Held,
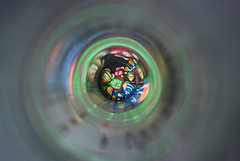
I this I feel the eye is being drawn away from the main subject and into the repeated curved pattern as it moves outwards towards the edge of the frame. This also gives the impression of movement as the light bounces up the inside of the tube. Previously I have used a flash on the outside of the tube to provide even more light, but in this case I just used sunlight filtered in through a window.
In the third shot I decided to go back to “old technology” and I went for the curved grooves on an LP record. I shot this from various positions until I got the light where I wanted it; I wanted the eye to be drawn through the frame following the movement of the groove.
Grooved
D80, Aperture f/3.3, Shutter Speed 1/60 sec, ISO 500, 105mm (35mm equivalent 157mm), Pattern Metering Mode, Auto White Balance, Hand Held
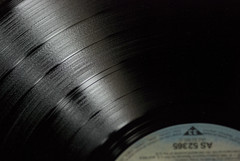
I liked the repetition of the curve and the grooves; and that the eye was drawn long the grooves creating its own movement in the opposite direction to which the record would actually have played.
In the fourth shot, I wanted a curve which also showed quick movement. So I decided on a skateboard wheel.
Wheel
D80, Aperture f4.5, Shutter Speed 1/60 sec, ISO 500, 105mm (35mm equivalent 157mm), Pattern Metering Mode, Auto White Balance, Hand Supported.
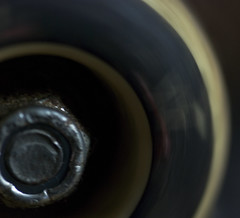
I wanted to use Macro for this image, as I wanted to get as close to the wheel as possible while still showing the movement of the wheel. I cropped off the right hand side of the image as this was just dead space within the composition and was doing nothing for the overall image. I went for a reasonable slow shutter speed to capture the movement of the wheel while at the same time showing the inner and outer curves of the wheel.
I found this quite a hard exercise to do. For some unknown reason I just could not get the compositions right to begin with and I had a hard time coming up with the ideas for the shots.
Overall I liked this exercise as it again forced me to look for something that I would not normally notice and I find now that I’m always looking for shapes, lines and movement where-ever I go.
Where: Various Locations inside and outside
When: All times of the day, sunny, rain and dull weather.
How: I had a good think about what subjects would be good for curves, as I live in an area dominated by late 1950’s early 1960’s architecture which is mainly all strong straight lines everywhere. As in the last few exercises I made a few notes and drawings to get the ideas clear in my head, again on visited some of the sites and photographing some of the ideas either they just did not work or that they failed to express the concept.
I mainly relied on one camera on this exercise and some of the photographs were taken where the camera was handheld as this gave me the freedom of movement and others were tripod mounted to give me the time to compose the image.
Curved Bridge.
D80,Aperture f/4.5, Shutter Speed 1/1600 sec, ISO 250, 62mm (35mm equivalent 93mm), Pattern Metering Mode, Auto White Balance, Tripod Mounted.
This is a relatively new piece of road built in the last 15 years or so. It actually crosses over an old sheep drover’s road and over the river both of which are in the valley below it. The bridge curves to bring two pieces of road together on either side of the valley and it swoops down and over the point of view from the drovers’ road below.
I decided to reshoot an old photograph that I had taken years ago, when I had first started using a DSLR. I have always liked the abstract curves and colour reflections that this shot creates
Fish in a Tube
D80, Aperture f/5, Shutter Speed 1/40 sec, ISO 500, 56mm (35mm equivalent 84mm),Pattern Metering Mode, Auto White Balance, Hand Held,
I this I feel the eye is being drawn away from the main subject and into the repeated curved pattern as it moves outwards towards the edge of the frame. This also gives the impression of movement as the light bounces up the inside of the tube. Previously I have used a flash on the outside of the tube to provide even more light, but in this case I just used sunlight filtered in through a window.
In the third shot I decided to go back to “old technology” and I went for the curved grooves on an LP record. I shot this from various positions until I got the light where I wanted it; I wanted the eye to be drawn through the frame following the movement of the groove.
Grooved
D80, Aperture f/3.3, Shutter Speed 1/60 sec, ISO 500, 105mm (35mm equivalent 157mm), Pattern Metering Mode, Auto White Balance, Hand Held
I liked the repetition of the curve and the grooves; and that the eye was drawn long the grooves creating its own movement in the opposite direction to which the record would actually have played.
In the fourth shot, I wanted a curve which also showed quick movement. So I decided on a skateboard wheel.
Wheel
D80, Aperture f4.5, Shutter Speed 1/60 sec, ISO 500, 105mm (35mm equivalent 157mm), Pattern Metering Mode, Auto White Balance, Hand Supported.
I wanted to use Macro for this image, as I wanted to get as close to the wheel as possible while still showing the movement of the wheel. I cropped off the right hand side of the image as this was just dead space within the composition and was doing nothing for the overall image. I went for a reasonable slow shutter speed to capture the movement of the wheel while at the same time showing the inner and outer curves of the wheel.
I found this quite a hard exercise to do. For some unknown reason I just could not get the compositions right to begin with and I had a hard time coming up with the ideas for the shots.
Overall I liked this exercise as it again forced me to look for something that I would not normally notice and I find now that I’m always looking for shapes, lines and movement where-ever I go.
Friday, 28 May 2010
Exercise 19
What: The brief of this exercise was to locate and photograph subjects which demonstrated strong diagonal lines.
Where: Various Locations
When: All times of the day, sunny, rain and dull weather.
How: I had a good think about what subjects would be good for diagonal lines. Again after making some notes, I visited some of the sites and quickly discounted some of the ideas as either they just did not work or that they failed to express the concept.
I mainly relied on one camera on this exercise and all the photographs were taken where the camera was mounted on a tripod.
I did find on one occasional that although the camera and tripod were level, examination of the final image showed that the ground ran downhill on a slight tilt from left to right, I did not notice this in the viewfinder due to the brightness of the sun.
I went looking for subjects which would express the concept of diagonal lines in either an actual or artificial horizon to the point of view of the viewer.
Coffin Alley
D80 Aperture f/22 Shutter Speed 1/8 ISO 160 11mm (35mm equivalent 16mm) Pattern Metering Mode, Auto White Balance, Tripod Mounted.
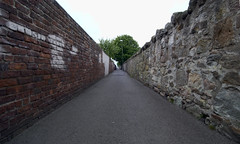
This lane goes on for quite a distance and on either side are high walls, one side brick and the other side stones. The lane is nicknamed “Coffin Alley” as it runs along the length of one of the graveyards, and was said to be the alley used to transport coffins to the graveyard.
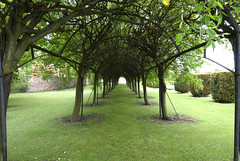
I repeated the style of this shot, of not the subject, at a long pergola/tunnel structured by trees.
Lines of trees
D80 Aperture f/4.5 Shutter Speed 1/50 ISO 160 70mm (35mm equivalent 105mm) Pattern Metering Mode, Auto White Balance, Tripod Mounted
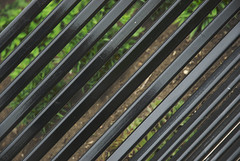
I liked the repetition and abstractness of this photograph, I feel that the combination of a large aperture and tight focus allows the eye to follow the lines through the frame.
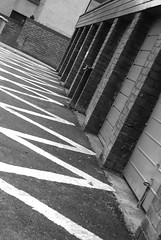
In the fourth shot, again I repeated tilting the camera, but this time I did this to capture the diagonal lines created by the walls supporting either side of each garage door. This along with the very strong diagonal grid on the ground produced strong diagonal lines and repetition of the structure.
Lines everywhere
Where: Various Locations
When: All times of the day, sunny, rain and dull weather.
How: I had a good think about what subjects would be good for diagonal lines. Again after making some notes, I visited some of the sites and quickly discounted some of the ideas as either they just did not work or that they failed to express the concept.
I mainly relied on one camera on this exercise and all the photographs were taken where the camera was mounted on a tripod.
I did find on one occasional that although the camera and tripod were level, examination of the final image showed that the ground ran downhill on a slight tilt from left to right, I did not notice this in the viewfinder due to the brightness of the sun.
I went looking for subjects which would express the concept of diagonal lines in either an actual or artificial horizon to the point of view of the viewer.
Coffin Alley
D80 Aperture f/22 Shutter Speed 1/8 ISO 160 11mm (35mm equivalent 16mm) Pattern Metering Mode, Auto White Balance, Tripod Mounted.
This lane goes on for quite a distance and on either side are high walls, one side brick and the other side stones. The lane is nicknamed “Coffin Alley” as it runs along the length of one of the graveyards, and was said to be the alley used to transport coffins to the graveyard.
I repeated the style of this shot, of not the subject, at a long pergola/tunnel structured by trees.
Lines of trees
D80 Aperture f/22 Shutter Speed 0.5 sec ISO 160 16mm (35mm equivalent 24mm)Pattern Metering Mode, Auto White Balance, Tripod Mounted
Again you have strong diagonal lines running into the centre of the frame, but this time the diagonal lines are repeated by the wall on the left hand side of the frame.
The third shot was where I decided to move the framing of the camera into a diagonal position to create the abstract diagonal lines running through the frame.
Diagonal Bench
Again you have strong diagonal lines running into the centre of the frame, but this time the diagonal lines are repeated by the wall on the left hand side of the frame.
The third shot was where I decided to move the framing of the camera into a diagonal position to create the abstract diagonal lines running through the frame.
Diagonal Bench
D80 Aperture f/4.5 Shutter Speed 1/50 ISO 160 70mm (35mm equivalent 105mm) Pattern Metering Mode, Auto White Balance, Tripod Mounted
I liked the repetition and abstractness of this photograph, I feel that the combination of a large aperture and tight focus allows the eye to follow the lines through the frame.
In the fourth shot, again I repeated tilting the camera, but this time I did this to capture the diagonal lines created by the walls supporting either side of each garage door. This along with the very strong diagonal grid on the ground produced strong diagonal lines and repetition of the structure.
Lines everywhere
D80 Aperture f9 Shutter Speed 1/50 ISO 160 56mm (35mm equivalent 84mm) Pattern Metering Mode, Auto White Balance, Tripod Mounted
I liked doing this exercise as again it demonstrated and enforced that framing the main elements within a photograph can help to produce strong results, especially in perspective and demonstrating distance.
I liked doing this exercise as again it demonstrated and enforced that framing the main elements within a photograph can help to produce strong results, especially in perspective and demonstrating distance.
Thursday, 13 May 2010
Exercise 18
What: The brief of this exercise was locate and photograph horizontal and vertical lines.
Where: Various Locations
When: All times of the day, sunny, rain and dull weather.
How: I had a good think about what would make good horizontal and vertical subjects for the photographs. At visiting some of the sites and doing a quick test shoot, I discounted some of the ideas as either they just did not work or that they failed to express the concept enough.
I used various cameras on this exercise and some of the shots are hand held and others are from a tripod.
I am finding that I’m seeing a tripod as less of a nuisance and more of a compositional tool, allowing me to walk around the subject and allowing me time to examine the subject in the viewfinder.
Horizontal
I went looking for subjects which would express the concept of horizontal either an actual or artificial horizon to the point of view of the viewer.
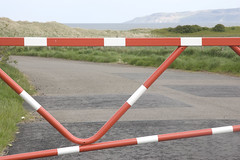
The first is quite simply a barrier gate, which locks off a piece of road leading down to a lifeboat. The barrier quite literally cuts a horizon across your point of view mainly due to its location and its colour.
D80 Aperture f/14 Shutter Speed 1/40 ISO 160 70mm (35mm equivalent 105mm)Pattern Metering Mode, Auto White Balance, Tripod Mounted.
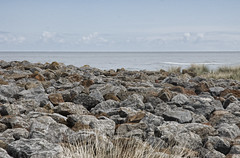
The next was quite obviously an actual horizon; I tried using the rule of thirds to locate the horizon quite far up the frame, as this allowed a good bit of the foreground to be seen and to lead the eye into the frame.
D80 Aperture f/11 Shutter Speed 1/250 ISO 160 70mm (35mm equivalent 105mm)Pattern Metering Mode, Auto White Balance, Hand Held.
I saw these railings as I was planning to use them as an example of vertical, taken side on. However I changed my mind and photographed them from the side, I tried to get the repeating elements of the horizontal handrails. The horizontal line is also reapeated in the background in the horizon and in the horizontal break in the clouds.
D40x IR Conversion (630nm) Aperture f/10 Shutter Speed 1/125 ISO 200 62mm (35mm equivalent 93mm) Pattern Metering Mode, Preset White Balance (colour corrected in Photoshop) Hand Held.
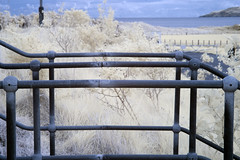
I quite like the fact that the railings have kept some of their colour and that the corrosion on the railings can be clearly seen.
While walking around the quarter mile in Edinburgh, I came across the front of this building while looking at the side of it. A friend of mine, Rob, was the architect on the building and I originally went along to photograph the cladding that he had put on the side of the building.
I liked the repetition of the screen as the rails/bars run in front of the windows.
D40x IR Conversion (630nm) Aperture f/9 Shutter Speed 1/100 ISO 200 70mm (35mm equivalent 105mm) Pattern Metering Mode, Preset White Balance (colour corrected in Photoshop) Hand Held.
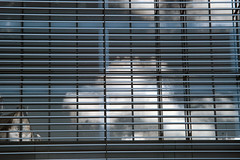
I like the fact that you get a reflection of part of the building behind and the definition of the cloud.
After looking at the notes, I thought I would add a few extra ideas that I had for horizontal
Vertical
Again for this exercise, I went looking for subjects which would express the concept of vertical either by dominating the point of view by size or by having one or more elements pointing straight up/down.
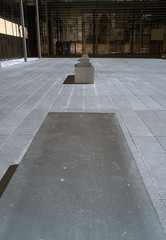
I tried not to orientate the camera into portrait mode for this part of the exercise, although I did for this photograph.
I liked the shape of these metal benches and they were located in a quiet area, so I was able to sit and examine the area through the viewfinder before taking the final photograph. I took this in both colour and IR. I decided on the IR version as it better defined the surface of the benches. The vertical line in this case is created by the benches leading off up into the frame
D40x IR Conversion (630nm) Aperture f/9 Shutter Speed 1/200 ISO 200 22mm (35mm equivalent 33mm) Pattern Metering Mode, Preset White Balance (colour corrected in Photoshop) Hand Held
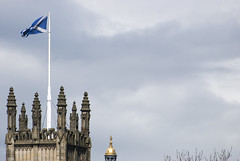
This was one of the first photographs I took for this exercise. I found this quite a compelling subject and decided to slowly frame it up. The first photo I took, the flagpole and the top of the church were too small in the frame. I moved closer and took a version where it was better defined in the frame. I went for the vertical line of the flagpole and the repeating horizontal lines of the tops of the columns.
D80 Aperture f/9 Shutter Speed 1/500 ISO 160 300mm (35mm equivalent 450mm) Pattern Metering Mode, Auto White Balance, Tripod Mounted.
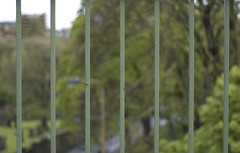
I had this idea quite early on, but with a different set of railings in mind, however when I saw the repeated colour of the railings in the trees in the background I decided to go with these railings instead. I went for the straight up and down lines of the railings to represent the vertical lines for this image.
D50 Aperture f/1.8 Shutter Speed 1/1000 ISO 200 50mm (35mm equivalent 75mm) Pattern Metering Mode, Auto White Balance, Hand Held
I’m not too sure about this last example, it worked better in my mind than it did when I took the photograph. The repeating vertical white blinds of this building were quite eye catching and I found that it lead me to look up and down the building front rather than across it so I used that as the idea of presenting the vertical lines within the frame.
D80 Aperture f/4.5 Shutter Speed 1/800 ISO 160 70mm (35mm equivalent 105mm) Pattern Metering Mode, Auto White Balance, Hand Held
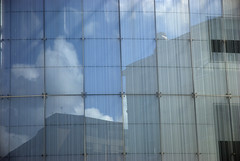
It was not until I had uploaded the photograph that I noted the step shape reflection of the buildings opposite.
Other ideas for vertical included.
Where: Various Locations
When: All times of the day, sunny, rain and dull weather.
How: I had a good think about what would make good horizontal and vertical subjects for the photographs. At visiting some of the sites and doing a quick test shoot, I discounted some of the ideas as either they just did not work or that they failed to express the concept enough.
I used various cameras on this exercise and some of the shots are hand held and others are from a tripod.
I am finding that I’m seeing a tripod as less of a nuisance and more of a compositional tool, allowing me to walk around the subject and allowing me time to examine the subject in the viewfinder.
Horizontal
I went looking for subjects which would express the concept of horizontal either an actual or artificial horizon to the point of view of the viewer.
The first is quite simply a barrier gate, which locks off a piece of road leading down to a lifeboat. The barrier quite literally cuts a horizon across your point of view mainly due to its location and its colour.
D80 Aperture f/14 Shutter Speed 1/40 ISO 160 70mm (35mm equivalent 105mm)Pattern Metering Mode, Auto White Balance, Tripod Mounted.
The next was quite obviously an actual horizon; I tried using the rule of thirds to locate the horizon quite far up the frame, as this allowed a good bit of the foreground to be seen and to lead the eye into the frame.
D80 Aperture f/11 Shutter Speed 1/250 ISO 160 70mm (35mm equivalent 105mm)Pattern Metering Mode, Auto White Balance, Hand Held.
I saw these railings as I was planning to use them as an example of vertical, taken side on. However I changed my mind and photographed them from the side, I tried to get the repeating elements of the horizontal handrails. The horizontal line is also reapeated in the background in the horizon and in the horizontal break in the clouds.
D40x IR Conversion (630nm) Aperture f/10 Shutter Speed 1/125 ISO 200 62mm (35mm equivalent 93mm) Pattern Metering Mode, Preset White Balance (colour corrected in Photoshop) Hand Held.
I quite like the fact that the railings have kept some of their colour and that the corrosion on the railings can be clearly seen.
While walking around the quarter mile in Edinburgh, I came across the front of this building while looking at the side of it. A friend of mine, Rob, was the architect on the building and I originally went along to photograph the cladding that he had put on the side of the building.
I liked the repetition of the screen as the rails/bars run in front of the windows.
D40x IR Conversion (630nm) Aperture f/9 Shutter Speed 1/100 ISO 200 70mm (35mm equivalent 105mm) Pattern Metering Mode, Preset White Balance (colour corrected in Photoshop) Hand Held.
I like the fact that you get a reflection of part of the building behind and the definition of the cloud.
After looking at the notes, I thought I would add a few extra ideas that I had for horizontal
- A Gate at wide
- A Street sign/arrow
- A bridge from below
- The bank of a river looking down into the river.
Vertical
Again for this exercise, I went looking for subjects which would express the concept of vertical either by dominating the point of view by size or by having one or more elements pointing straight up/down.
I tried not to orientate the camera into portrait mode for this part of the exercise, although I did for this photograph.
I liked the shape of these metal benches and they were located in a quiet area, so I was able to sit and examine the area through the viewfinder before taking the final photograph. I took this in both colour and IR. I decided on the IR version as it better defined the surface of the benches. The vertical line in this case is created by the benches leading off up into the frame
D40x IR Conversion (630nm) Aperture f/9 Shutter Speed 1/200 ISO 200 22mm (35mm equivalent 33mm) Pattern Metering Mode, Preset White Balance (colour corrected in Photoshop) Hand Held
This was one of the first photographs I took for this exercise. I found this quite a compelling subject and decided to slowly frame it up. The first photo I took, the flagpole and the top of the church were too small in the frame. I moved closer and took a version where it was better defined in the frame. I went for the vertical line of the flagpole and the repeating horizontal lines of the tops of the columns.
D80 Aperture f/9 Shutter Speed 1/500 ISO 160 300mm (35mm equivalent 450mm) Pattern Metering Mode, Auto White Balance, Tripod Mounted.
I had this idea quite early on, but with a different set of railings in mind, however when I saw the repeated colour of the railings in the trees in the background I decided to go with these railings instead. I went for the straight up and down lines of the railings to represent the vertical lines for this image.
D50 Aperture f/1.8 Shutter Speed 1/1000 ISO 200 50mm (35mm equivalent 75mm) Pattern Metering Mode, Auto White Balance, Hand Held
I’m not too sure about this last example, it worked better in my mind than it did when I took the photograph. The repeating vertical white blinds of this building were quite eye catching and I found that it lead me to look up and down the building front rather than across it so I used that as the idea of presenting the vertical lines within the frame.
D80 Aperture f/4.5 Shutter Speed 1/800 ISO 160 70mm (35mm equivalent 105mm) Pattern Metering Mode, Auto White Balance, Hand Held
It was not until I had uploaded the photograph that I noted the step shape reflection of the buildings opposite.
Other ideas for vertical included.
- Stream of water running from a tap – slow shutter speed to indicate movement
- Row of supporting fence railings – wide aperture to define them from the background
- Large glass or steel fronted building – wide angle (perhaps)
- A row of trees in a meadow
- Either a single or a row of flagpoles
I learned a lot from this exercise, mainly to do with looking at subjects with a different point of view, looking for unusual ways of presenting or breaking up the frame. I also learned that I do not have to rely on the orientation of the camera when I want to portray certain concepts and ideas.
I also learned that a tripod is not a hindrance, but a benefit when composing.
Subscribe to:
Posts (Atom)