Saturday, 3 April 2010

Assignment 1

I'm getting close the final choice of images for this assignment. My wall board beside where I'm studying is covered in photographs. I've made a few changes already and taken advantage of "good" days where I can move around with less pain and difficulty.
Once of my main challenges is how I'm going to get my sketches onto this blog so that I can demonstrate my thought processes. My daily note book is covered in notes and sketches from working and discarded ideas.
So far, it has been more fun than I thought!

Exercise 12

What: The brief of this exercise was locating a area with a neutral horizon and compose several photos where the horizon was in differing positions in the frame.

Where: White Sands, East of Dunbar

When: Just after noon.

How: I locked the camera of in a tripod and by tilting the camera up and down took photographs where the horizon was either in the middle, towards the top of the frame and towards the bottom of the frame. Each photo was then examined to see what impact moving the horizon had done to the composition of the photograph.

The first sequence of photographs I took for this exercise when reviewed before posting did not look “right”. Due to the complete lack of clouds on the day, the sky appeared as just a blue bank which just did not appeal to me at all. I waited until I had a day where it was not raining and I had some clouds in the sky before reshooting the sequence. As before I locked the camera off on a tripod and just moved the head back and forwards to reposition the horizon.

The first photograph is where the horizon is positioned at the top of the image, almost out of the frame completely.

f/22 1/30 ISO 100 18mm (35mm Equivalent 27mm)

DSC_0043

I like this photograph as the beach stretches off into the distance, and the tide line draws the eye from left to right into the image. The horizon is so far off into the distance that you almost think you can see the curvature of the earth.

The second photograph the camera was raised slightly so that the horizon was now in the frame and the foreground was reduced slightly

f/22 1/40 ISO 100 18mm (35mm Equivalent 27mm)

DSC_0044

In this photograph the foreground looses a little of its impact, although now you can see the clouds in the sky. I feel that my eye is drawn less to the foreground and the tide line in the mid-ground, but instead I feel that I am drawn more towards the horizon.

The third photograph the camera was again raised slightly so that the horizon was now almost right in the middle of the frame.

f/22 1/40 ISO 100 18mm (35mm Equivalent 27mm)

DSC_0045

In this photograph the sky has a greater impact on the image and that it is now balancing off the ground below, again I still feel drawn to the beach part of the image due to the patterns and shapes of the stones, but I also feel my eye being drawn up into the sky to examine the clouds.

The fourth photograph the camera was again raised slightly so that the horizon was now right in the middle of the frame.

f/22 1/50 ISO 100 18mm (35mm Equivalent 27mm)

DSC_0046

In this photograph the horizon is almost bang in the middle of the frame. There is little of the beach foreground left. I feel that my eye is allowed to roam around the image, as the image is quite balanced .

The fifth photograph the camera was again raised slightly so that the horizon was now a little below the middle of the frame and the sky was now the dominant part of the image.

f/22 1/50 ISO 100 18mm (35mm Equivalent 27mm)

DSC_0047

I feel that there is little to separate this image from where the horizon is in the middle. There is little of the beach left in the foreground. The eye is drawn now the beach into the mid-ground and the horizon. The sky is well balanced here and creates balance in the image between the elements below and above the horizon.

The sixth photograph the camera was again raised slightly so that the horizon was now well below the middle of the frame and now is positioned almost at a third of the image from the bottom

f/22 1/50 ISO 100 18mm (35mm Equivalent 27mm)

DSC_0048

Looking back at this image, although the horizon was positioned straight across the image, it appears that it is slanted slightly to the left. This is a bit of an optical illusion caused by the shape of the beach in the mid-ground on the right hand side of the image. I quite like this image as I am drawn up to the sky and to the clouds. It helps to show the depth of field of the image and show that there is a great distance off to the horizon.

The seventh and last photograph the camera was again raised slightly so that the horizon was now almost at the bottom of the frame.

f/22 1/50 ISO 100 18mm (35mm Equivalent 27mm)

DSC_0049

I feel in this image that the depth of field and distance have been lost. The sky dominates the image and with almost no foreground and the horizon being so low that there is now an imbalance between all the elements in the photograph.

Saturday, 20 March 2010

Invigoration

Today and on Wednesday I have been down at Aberlady Nature Reserve attempting to walk a little further than currently. While down there I carried my camera just in case I saw something that I could photograph. Much to my surprise I noticed a few birds of prey (which I missed!) and some deer and some frogs. I managed to slowly walk towards the deer and I was very excited to see that they did not move; I managed to get to one of the pre-war concrete anti tank blocks and photograph a male and 3 female deer eating together. This has renewed my excitement in photography as I watched them move in my viewfinder.
I also spent some time photographing the frogs as they wandered the dirt path looking for mates. Next time I go I plan to take a macro lens as I find the eyes of the frogs an interesting subject.

This whole episode has allowed me to review my thinking regarding the upcoming assignment and has given me a few new ideas and it has invigorated and excited me about photography again.

Wednesday, 17 March 2010

Blogger Upload Issues

For the last few exercises I have faced the problem of uploading them to Blogger, frequently I upload the images only to have a HTTP 500 error at the end of the process, or I end up with the images uploading in a different order and with extra white space either in the page or in the image.

I have to resort to uploading some of the exercise images onto my flickr page and then cross linking the images back to the Blogger page, which then crops the images.

The only sucessful way for me to upload images to this blog at the moment is to use Google Chrome to upload the images and then IE8 to move them around and then when all this is done I have to then insert the text around the images.

I am finding this wastes a lot of my time and leaves me very frustrated when trying to complete the exercises.

Monday, 8 March 2010

Exercise 11

What: The brief of this exercise was go back and examine six photographs that I had previously taken and see if I could identify and document the “balance” elements in the
Where: At Home
When: Just before noon.
How: I decided to look back over some photographs I had taken previously, I finally selected 7 photographs I had taken as part of a one photograph a day project that I had completed 515 days of.

As I first looked over these photographs I found it quite hard to identify the simple elements showing how balance works in each of the photographs. I decided to draw over the photographs with a coloured box or line to identify an element. Once I had identified the elements I then drew a balance weighting scale showing what I thought the balance is.

1. Chair on Beach


I was able to identify the chair on the left and the block of rocks on the right as two elements. I coudl have also Identified the horizon as a line of balance too.


The weighting scale showing the balance.


2. Fly on Buttercup.


I identified the fly as the main element of the photograph. I then examined the blades of grass going off at odd angles out of the frame. I chose them as the elements for balance as they push outwards and due to the focal depth and the out of focus background they move the eye back to the flower and the fly.


Each of the blades of grass have equal weighting. This just leaves the fly and the flower in the middle of the screen as the main elements creating the final balance of the image.

3. Tree Highrise


At first I could only identify one main element of this image and that was the main body of the tree. After examing the image on the screen I then identified a small part of the tree which flows into the main element of the image. As these two elements were merged the balance is held together. The sky could also be identified as a third element on top of the other two.


Both elements together in the middle of the image create the balance of this image. I chose only to show these two elements as I felt with the sky that the balance was very top heavy.

4. Smoke Coils


The coils of smoke as they rise through the frame are repeating as they flow. The main elements of balance in this image are the coils themselves.


Each coil of smoke draws the eye upwards to the next, I could have just had the fours elements sitting on top of each other in the diagram, but I really wanted to show that the four elements together balance up each other.

5. Triangle light


This was quite a hard image to decide on where the balance was, as the abstractness of it makes it quite unusual. I had to really look at the image before I decided that the only elements in this image were the triangle of light and the small circle of light near the bottom right of the image. Once I had identfied the two elements, I drew the diagram showing that the larger triangle is balanced against the smaller brighter light. The


I chose to seperate the two elements in the weighting diagram to show that although the two elements are near each other that in fact they are seperate elements which make up the balance of the image.

6. Castle at Night.
This is quite a simple image, the castle is light up from below and between the dark night sky and the dark rocks below sits the castle. This image is made up from three elements, the two larger towers at either side of the frame and the longer block of light below them.


The two smaller elements together are balanced by the larger element which they merge into. This creates the balance between the three items.

7. Wet web.
I chose to select a seventh image, as I wanted to practice my examination and identification of balance. This was quite an easy one to do; the centre of the web is the main element and the strands of the web flowing out and away create the tension and balance of the image.

As the centre of the web is the main element is has the heaviest weighting, the smaller strands flowing away in all directions help to identify the main element and then balance it.
This has been quite a helpful exercise, as I had not previously examined my photographs for balance and this has shown that some of my compostions were "easier" on the eye than others.
I believe that the more balanced compositions were easier to look at, and that when I take photographs I should be examining what the balances are and if they help in the overall composition of the image.

Exercise 10

What: The brief of this exercise was to photograph the same subject using two different lenses, one at either end of the available focal length
Where: Dynamic Earth, Edinburgh
When: Mid Morning. The weather was dry but cold.
How: I used two different lenses for this exercise, a telephoto and a wide angle. I decided on these focal lengths as I wanted to demonstrate the resulting difference in perspective.

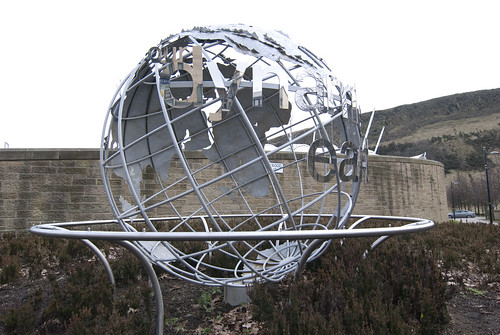
I was going to use the Dynamic Earth building for this exercise, however there was a politic party meeting on and the area was filled with television camera teams, journalists and politicians. I then decided on the Dynamic Earth Sign outside the building. I could get a good distance away from it, about 40 feet and I could get up close to it without getting knocked down by a car or bus.

I took the first photograph from about 40 feet away using a telephoto lens.

f7.1 1/200 ISO 250 180mm (35mm Equivalent 270mm)


I took the second photograph from about 3 feet away using a wide angle lens

f7.1 1/200 ISO 250 14mm (35mm Equivalent 21mm)


Looking at the two images on my screen, straight away I spotted that was the difference in the background; the telephoto image has a flatter feel to it as there is only the wall behind the subject. While in the wide angle image I can clearly see sky, plants and wall. The wide angle image has a deeper perspective as you can see off into the distance. The telephoto image only shows some of the wall and is flatter in perspective as you cannot judge the distance between the subject and the wall, but it does make it stand out better from the background.
The wide angle image gives the impression that the subject has a greater distance between the parts of the scene itself. You can tell that the globe is quite large and that there is a foreground, middle and background demonstrating the distance between the viewer and the subject.
The telephoto image does not demonstrate this effect, for example the circular bar around the subject does not give the impressions that there is a great distance between the rear of the subject and the front, and you cannot tell how far the globe is from the wall and how far it is from the viewer.
As before I had not really thought about the effect that using a telephoto lens has on the perspective of a photograph. This exercise has made the start to think about how I want to photograph as subject and whether or not I should use a telephoto lens or a wide angle lens. There will be times when a telephoto lens could be used where in fact a wide angle lens and moving close into the subject would be more suitable.
From this exercise and Exercise 8 I now know that there are times when I am just not close enought to my subject, forcing me to use a telephoto lens rather than thinking about how to compse an image and in fact get closer to it giving a greater depth of field and a better viewpoint.

Exercise 9

What: The brief of this exercise was locate a subject which was a good distance away and using a combination of lenses and focal lengths, move from a wide angle view of the subject to a zoomed in tight view of the subject


Where: White Sands, East of Dunbar


When: Just after noon.


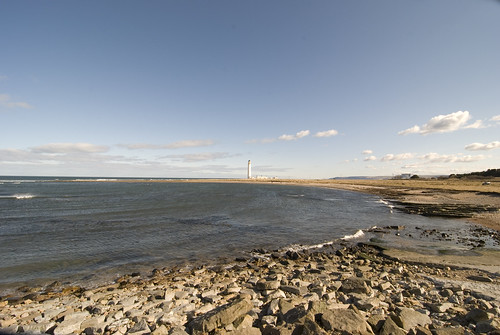
How: I decided to use a combination of lenses to photograph a lighthouse which was on the other side of the bay. I started at 11mm and moving through the range of this lens, I moved to an 18-55mm lens before finishing with a telephoto 70-300mm lens


f11 1/8 ISO 100 11mm (16mm at 35mm equivalent)


I decided to start by photographing as far away as I could, where I could have the lighthouse
in the centre of the frame as it touched the horizon.

I quite like this photo as the curve of the rocks in the foreground lead you off to the horizon where the lighthouse sits.


f11 1/80 ISO 100 14mm (21mm at 35mm equivalent)
A slightly closer in photo. There is not much difference between the 11mm and the 14mm photo,
however I feel that the 11mm image is better composed as it has more of a curve, showing the bay
and leading into the photograph.


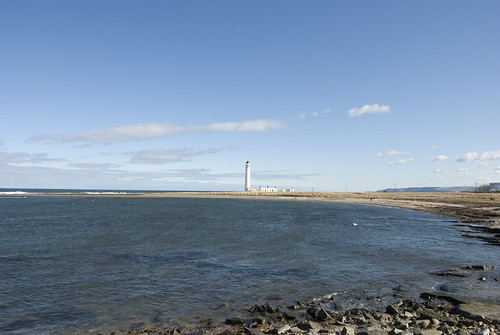
f11 1/80 ISO 100 16mm (24mm at 35mm equivalent)
Again lightly closer in , you can start to see the difference in the background of the photograph as
objects disappear in the distance.

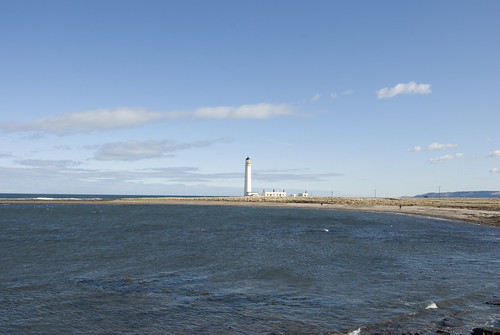
f11 1/125 ISO 100 18mm (27mm at 35mm equivalent)
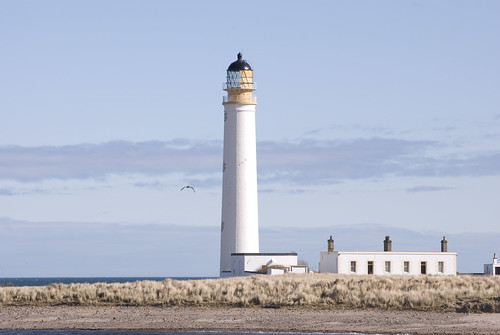
The lighthouse begins to stand out, more detail is shown and you can start to see the small buildings around the base of the lighthouse. The background on the right of the photo shows that the hills have almost disappeared out of the frame as the photographs zoom further into the lighthouse.

f11 1/125 ISO 100 24mm (36mm at 35mm equivalent)
The lighthouse stands out now, I recomposed the photo slightly as there was a lot of negative space on the left of the photograph.

f11 1/160 ISO 100 35mm (52mm at 35mm equivalent)
The lighthouse is more distinctive now, the shapes at the top of the lighthouse are becoming more distinctive. The foreground is now the water of the bay.

f11 1/200 ISO 100 45mm (67mm at 35mm equivalent)
There is again not much difference in this photo and the one above. In this case all the background which was on the right hand side of the frame has now disappeared and the focus is becoming tighter on the lighthouse.
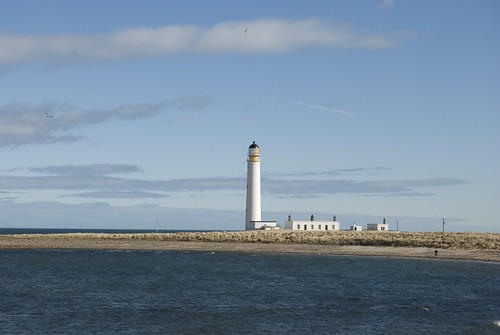
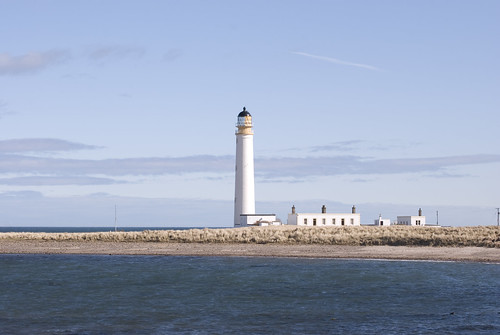
f11 1/200 ISO 100 55mm (82mm at 35mm equivalent)
This photo starts to show the foreshortening of the subject as I am using a telephoto lens. the distance between the building in front of the lighthouse and the lighthouse itself have been flattened.

f11 1/160 ISO 100 70mm (105mm at 35mm equivalent)
This is quite tight on the subject. At this point I should have moved the camera into portrait so that I could continue zooming into the lighthouse. However I wanted to capture not just the lighthouse but the buildings which huddled against it.

f11 1/200 ISO 100 86mm (129mm at 35mm equivalent)
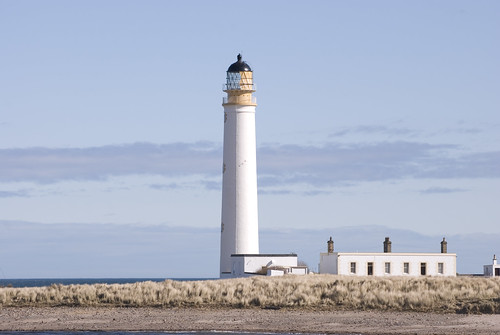
The top of the structure of the lighthouse is now clearly defined, as are the buildings below. Now not much of the bay is showing in the foreground.

f11 1/200 ISO 100 135mm (202mm at 35mm equivalent)
I decided to continue zooming into the lighthouse as part of the exercise so that I could later examine the wide angle photos are compare the amount of detail captured and so I could use a magnifying glass to examine the wide angle photo and compare it to this one.

f 11 1/200 ISO 100 195mm (292mm at 35mm equivalent)
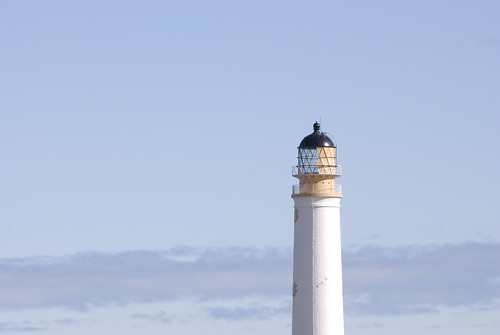
I decided to zoom into the top of the lighthouse to capture the structure of the glass at the top, to see if the frames around the panes of glass could be seen in the wider angle photos.

f11 1/160 ISO 1200 300mm (450mm at 35mm equivalent)
A bit of overkill, I zoomed right into the top of the structure.

I enjoyed this exercise as it allowed me to compose over a number of focal lengths, looking back at the final images I can see where I could/should recompose the photos by either moving the camera to another location or changing the orientation of the camera.