Sunday 21 August 2011

Assignment 4 – Applying Lighting Techniques

What: The brief of this assignment was to show the command of lighting techniques to bring out particular physical properties of the same object using daylight, available artificial lighting to photographic Lighting.Where: At various locations
When: Multiple days.
How: First of all I made sure that I fully understood the brief of the Assignment by reading over the text a number of times. As I progressed through the assignment I made notes at each shooting in my daybook in the style of a diary and included in the daybook some drawings and diagrams on some of the concepts that came to mind after reading the text and after looking at some previous photographs I had taken. I will include these notes and concepts in this assignment paper.

I looked at the main qualities for the images detailed in the assignment;

Shape – The outline or edge of the object, minimal detail visible in the object.
Form - The volume of the object, how three dimensional the object looks.
Texture - The quality of the surface detail
Colour - The Objects colour(s)

There is an allowance in the assignment to add in other interesting, unusual or attractive lighting.

In the beginning I experimented with a number of objects, a plain stone statue, a wooden model of a hand, a bottle of bourbon and a metal flask. In each of the experiments I found that I had a number of images which would work well within part of the brief, but were useless for the at one or two of the main parts of the assignment brief. In the end I abandoned all the ideas and after looking at a number of objects in varying lighting conditions, I eventually decided on a glass candle holder.

I then sat down and considered what kind of lighting I could use to create the qualities required in the brief, the glass candle holder had a unique texture, was colourful and was light enough that I could move it around into different lighting conditions and arrangements which would allow me to photograph the qualities I wanted by controlling the light. It also meant that I could sit with the object nearby and have it to hand if I wanted to suddenly experiment with a change of daylight or change in artificial lighting.

I also used Kevin Kertz lighting diagram Photoshop template to allow me to record the setup used when using artificial and photographic lighting.

Shape

1. Shape Number Three.

At first I wanted to reproduce and experiment with an idea I had seen described I a number of years ago which I had then used to photograph a glass object using the method of dark field photography. However I could not find a satisfactory shot which did not appear to be too dark.

This was the third selected image from my attempt to control photographic lighting through the use of a light tent. There was a single diffused flash off to the left of the subject which was further diffused through the white wall of the light tent. The object was sitting on the backdrop cloth of the text and I had turned the light tent around so that the back of the light tent was acting as a black flag soaking up any overspill of light from the flash. On the right hand side of the light tent was a white card reflector to bounce back some of the light for shadow fill. I did not want to make the object too dark as I did not want to lose the overall shape of the object entirely.

Nikon D80, focal length 38.0mm (35mm equivalent 57mm), aperture f19, speed 1/180 , ISO 100, Flash white balance, Pattern Matrix metering, tripod mounted camera, 18-55mm lens, Single flash.
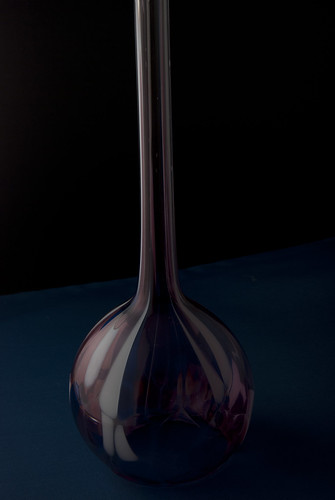
Shape Three

The main idea of the composition was to show the simple shape of the upturned object, showing that the shape flowed from a bowl into a long stem. I wanted to draw the eye upwards through the shape and out the top of the frame. I really wanted the middle of the object to remain black and unfilled by light as I wanted the shape to be split by the darkness.

2. Form Number Three

I really wanted to use daylight for at least on one of by photographs as I wanted to show that I could control daylight as a lighting technique. At first I wanted to use daylight to produce the quality of colour as I knew that the glass object would light up when it was subjected to bright daylight. It was while I was outside waiting for a cloud to pass over that I started to experiment with the subject in non direct daylight. I started at first in complete shade, moving outwards until I was almost in complete daylight. In this image I was just on the border of shade and daylight and when I held the object up into the air I could see that the form of the object was well defined due to the lighting conditions. I went back to my camera and changing the white balance and ISO settings I took the image.

Nikon D80, focal length 46mm (35mm equivalent 69mm), aperture f11.0, speed 1/180 second, ISO 320, Shade White balance, Pattern matrix metering, Hand Held, 18-55mm lens, no flash.
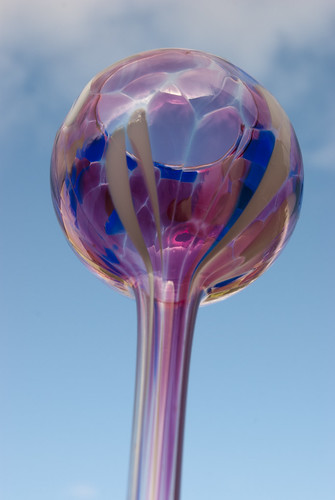
Form Three

I like the fact that the simple shadow from the other side of the object flows through the shape and that it helps to define the bowl shape at the top of the object. I also like the colours produced and I almost entered this as a colour example, but I preferred the way that the volume of the object is projected.

3. Texture - Monochrome

One of the reasons I had chosen this subject was that the glass itself had quite an interesting texture, not only around the rim, but also over the bowl part where it was ridged and patterned between the colours.

At first I found it quite difficult to capture the texture of the object without using a Macro lens as the pattern was difficult to see in certain lighting conditions. I feel that the colour was detracting from the image and drawing the eye away from the texture and onto the colours and the overall shape. Finally I decided to use artificial light; in this case I used a small torch shining directly at the bowl part of the object. I then took a number of shots with different exposure values, and also using exposure compensation of +/- 1 stop. I then converted all the images to monochrome as I wanted to extract the colour which I felt was detracting the eye.

Nikon D80, focal length 42mm (35mm equivalent 63mm), aperture f19.0, speed 1/180 second, ISO 100, Flash White balance, Pattern Matrix metering, Tripod Mounted, 18-55mm lens, Single light source.
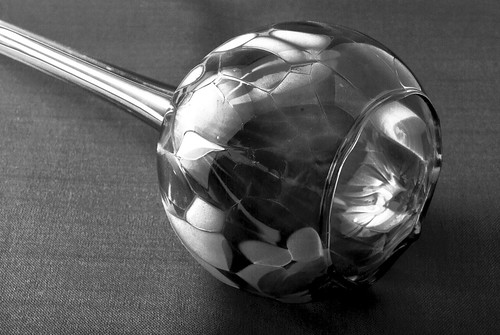
Texture - monochrome

I feel that the final image shows the texture and pattern of the object and shows the definition of its shape as well. I was pleased to see that the light was distorted inside the bowl and has produced a distorted reflection of the light and of the texture.


4. Colour

In the beginning I had wanted to use daylight for describing colour, but as I had produced the image for Form using daylight I decided to have at an attempt at colour using strong photographic lighting.

At first I experimented with having the light direct and above the object but I did not get the colour from the shape that I wanted. In the end I decided to point the studio flash at the white reflected card which I was using as a background; I knew some of the light from the flash would hit the glass object and I knew that the reflected light would bounce straight towards the camera lens through the object if I placed the reflector in the right position.

Nikon D80, focal length 55mm (35mm equivalent 82mm), aperture f32.0, speed 1/180 second, ISO 125, Flash White balance, Spot metering, Tripod Mounted, 18-55mm lens, Single Studio flash.
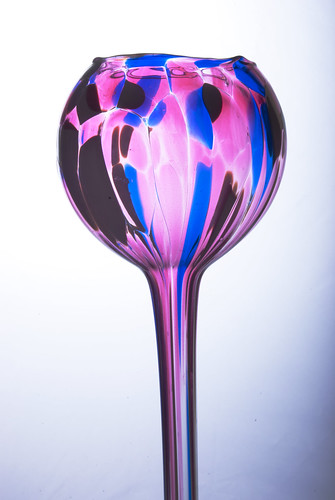
Colour

I was pleased to see that the colour just popped out of the white background and that the blues and whites were not overrun by the pink and purple of the object. I was also please to see that the main hue of the object does not vary down the full length of the image.


5. EL Wire

I had a play with this type of lighting previously and I liked the effect that I could produce with it. Here I am using the electroluminescent wire (EL wire) in there different colours pushed up through a hole in the base of the object; the wire I used was coloured, red, white and pink, although when used in this style they are more of a red/orange, white/blue pink/purple. The fact that the white and the pink hues were close to the hues of the object was a pleasant surprise and the red really stood out against the other colours and produced an eye-catching effect.

You can almost see the original hues of the wires as they run up the inside of the stem, but once they intermingle within the main bowl they take on an almost neon effect.

Nikon D80, focal length 55mm (35mm equivalent 82mm), aperture f7.1, speed 1 second, ISO 640, Auto White balance, Spot metering, Tripod Mounted, 18-55mm lens.
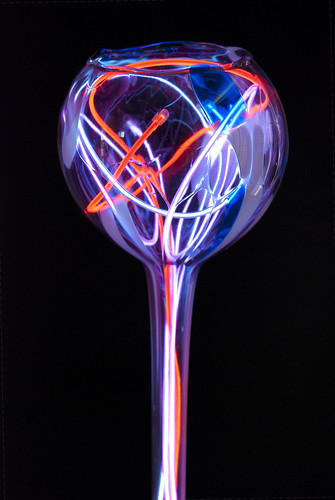
El WIre

I did not want the bowl too loose its entire colour and become too underexposed so I went for a longer exposure than normal at a higher ISO as I wanted the entire object to be defined not just the wires. In the end I feel that I captured a strange combination of light and shape which I am very pleased with.


6. Form Two

Here I return to the quality of form. This idea was based around the unsuccessful dark field attempts, I just decided to back off a bit and remove some of the more complex parts of the idea and setup and just shoot a straight contrast/shadow fill using one light and a reflector. With a single studio flash with a white umbrella for diffusion on the left of the camera and a white card reflector on the right of the camera I took a couple of shots moving the composition of the subject around until I had it was I wanted it.

Nikon D80, focal length 50mm (35mm equivalent 75mm), aperture f16, speed 1/180 second, ISO 125, Flash White balance, Pattern Matrix metering, Tripod Mounted, 50mm lens.
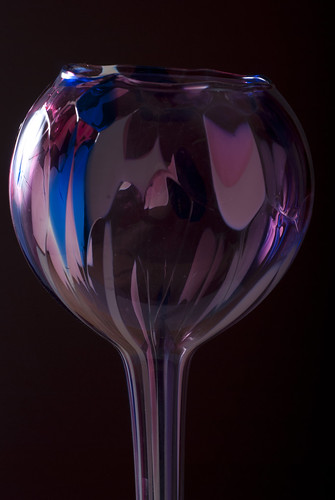
Form Two

Using the 50mm prime lens allowed me to move in quite close to the subject and I relied on having the room in partial darkness to soak up some of the overspill light from the flash. While I am quite pleased with the final image and it defines the form of the object it was not the “first chosen” image but I wanted to see and to show that I could capture the quality of form using artificial light and with some experimentation on fill.

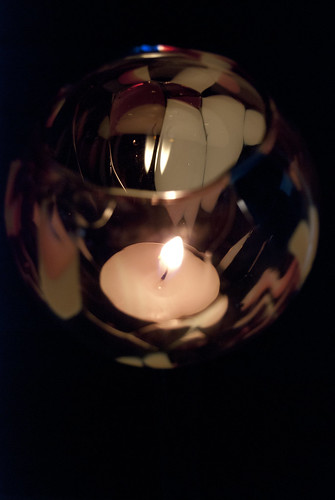
7. Candle

As the object was originally designed to hold a small candle, i felt that it was an injustice not to attempt at least one image where the object was light up using only candle light. I had to play around for a while to find a way that I could safely balance the object while getting above it to photograph it. I did not want to get too close for fear of burning either myself or the camera!

In the end I pushed the stem into a cardboard box and balanced the whole thing on a table. Under the box and extending off into a background in a large piece of black card as I did not want any reflected light coming back up into the stem or into the bowl. I just wanted to capture the light from the top as it shone out through the object.

Nikon D80, focal length 52mm (35mm equivalent 78mm), aperture f5.6, speed 1/30 second, ISO 640, Auto White balance, Spot metering, Tripod Mounted, 18-55mm lens.
Candle

In this case I had to plump for Auto White balance as I felt that both shade and overcast weather white balances did not produce the right hues. As it was I not had time for a two shots before the whole thing toppled over and almost set fire to the black card and a chair. At this point I abandoned the idea of taking further shots.

I am happy with the composition and colours within the image as I feel that it gives a good representation of the colours that the candle light produced.


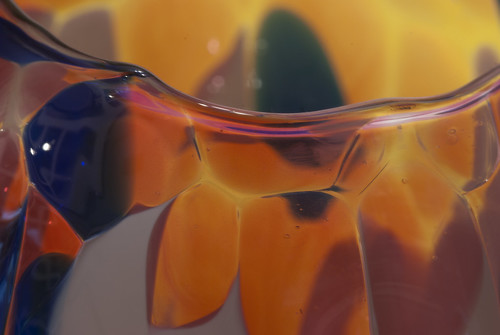
8. Texture 2

I had been experimenting with a Macro lens with a ring flash on it and had produced some up close images of the texture of the glass. However I felt that the final colour of the image was being overcast by the colour of the object. I went out and obtained a large piece of yellow card and placed this behind the object. I then removed the ring flash from the front of the lens and set the camera up on a tripod. This allowed me to turn on the artificial light in the room and I decided to work by the tungsten light instead of using flash.

Nikon D80, focal length 105mm (35mm equivalent 157mm), aperture f19, speed 10 second, ISO 125, Tungsten White balance, Spot metering, Tripod Mounted, 105mm macro lens.
Texture 2 - Violet Glass and Yellow Background - Tungsten Light

I again went for a long exposure as I wanted to capture the leaf like texture of the object and I wanted the yellow top break up the pinks and purple hues and make it more flower like in its shape and definition.

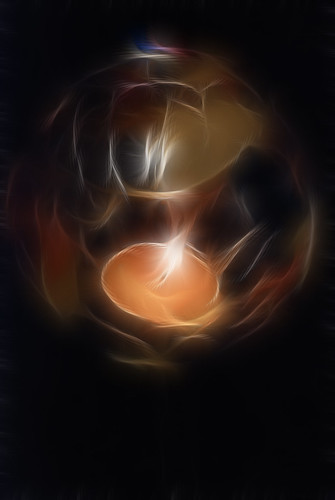
Additional Images – Fractal Candle

I am not sure that this can be a genuine submission as in this case the light was then enhanced in post production using a mathematical algorithm to distort the paths of the light. However I liked the image.
Fractal Candlelight

Summary

I have found this assignment a bit of a challenge to start with as I just could not find the right object. Once I had the right object then I feel things became better and I was able to freely experiment with differing lighting conditions and situations and take multiple images under these conditions. I also feel that I made the right choice straight away for some of my ideas and the lighting conditions just fell together and that I had full control of the light.

At the end of the assignment I have however started to re-examine the world around me for the way that lighting has an effect on shape, colour and definition of everything around me. I feel that I can now produce better images than before as I finally understand what is happening to the light around me and how that interacts with the camera lens. This part of the course has also reinforced the primary and secondary colours as well as composition as at times I had to move the subject around or move myself around to improve the final image. One of the main things to come out of this part of the course is that I now feel that I do not make enough notes and that I am going to have to try harder to make more complete notes as I think this can hold me back sometimes.
Wednesday 17 August 2011

Assignment 4

Almost ready for posting out to my tutor. Only a couple of corrections!

Thursday 11 August 2011

Exercise 42 Shiny Surfaces

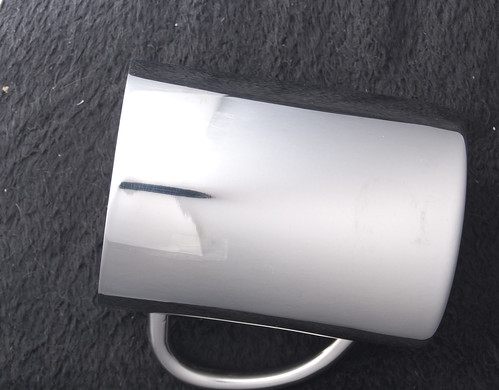
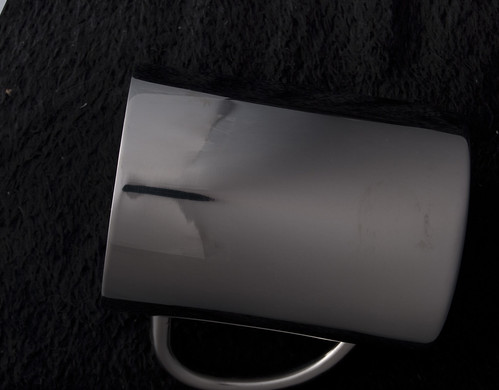
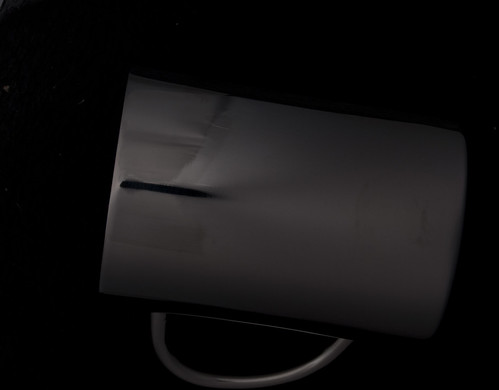
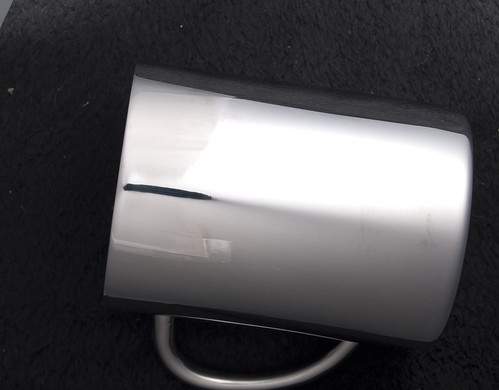
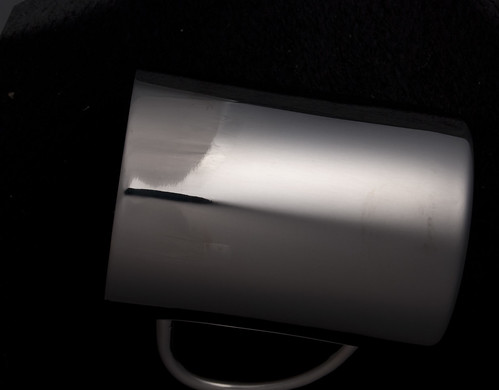
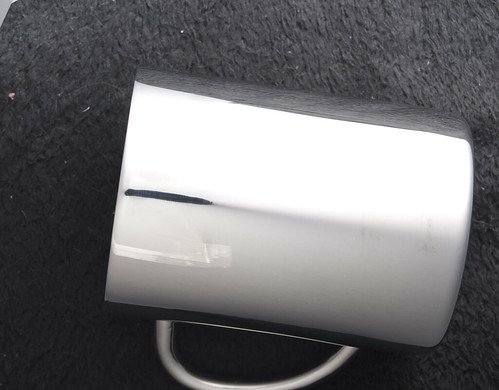
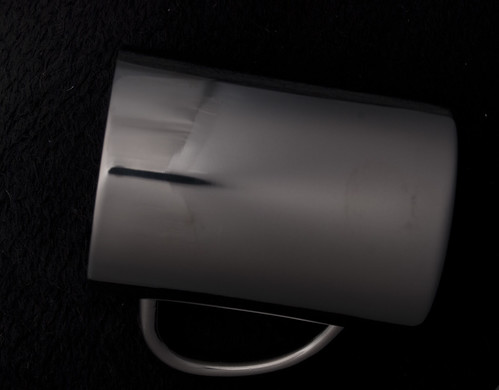
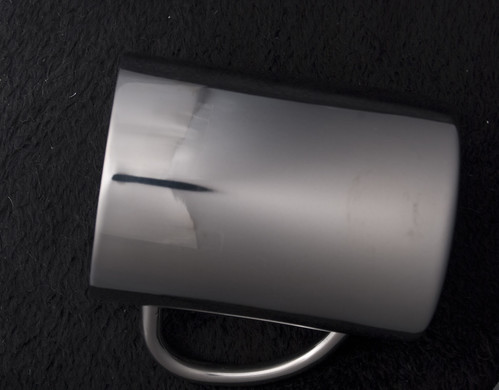
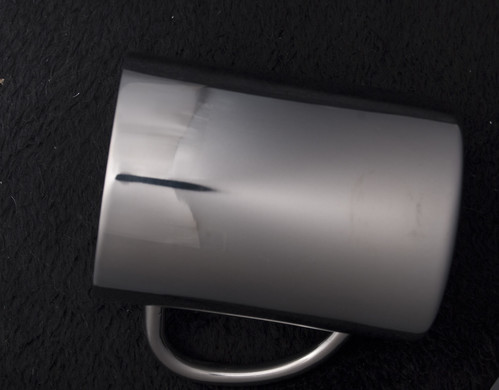
What: The main brief of this exercise was to make a covering for the camera lens so that I could photograph something shiny without reflecting the camera lens or reflecting the light back from the subject into the lens creating an overexposed image.
Where: Inside the house with the outside light blocked by blackout curtains.
When: During the evening.
How: I first of all I cut up some large sheets of tracing paper and made them into a cone, I then fitted the cone round the camera lens and mounted the whole lot onto a tripod, so that I could point the camera down at the shiny metal cup. I then moved the light around the cone and also move it towards and away from the cone to see what would happen when there was a lot of light or not enough light.

Shiny Surface 1

D80,Aperture f/9.5, Shutter Speed 1/30 sec, ISO 100, 55mm (35mm equivalent 82mm),Pattern Weight Metering Mode, Flash White Balance, Tripod Mounted, 18-55mm lens

Shiny Surfaces 1

Shiny Surface 2

D80,Aperture f/9.5, Shutter Speed 1/30 sec, ISO 100, 55mm (35mm equivalent 82mm),Pattern Weight Metering Mode, Flash White Balance, Tripod Mounted, 18-55mm lens

Shiny Surfaces 2

Shiny Surface 3

D80,Aperture f/9.5, Shutter Speed 1/30 sec, ISO 100, 55mm (35mm equivalent 82mm),Pattern Weight Metering Mode, Flash White Balance, Tripod Mounted, 18-55mm lens

Shiny Surfaces 3

Shiny Surface 4

D80,Aperture f/9.5, Shutter Speed 1/30 sec, ISO 100, 55mm (35mm equivalent 82mm),Pattern Weight Metering Mode, Flash White Balance, Tripod Mounted, 18-55mm lens

Shiny Surfaces 4

Shiny Surface 5

D80,Aperture f/9.5, Shutter Speed 1/30 sec, ISO 100, 55mm (35mm equivalent 82mm),Pattern Weight Metering Mode, Flash White Balance, Tripod Mounted, 18-55mm lens

Shiny Surfaces 5

Shiny Surface 6

D80,Aperture f/9.5, Shutter Speed 1/30 sec, ISO 100, 55mm (35mm equivalent 82mm),Pattern Weight Metering Mode, Flash White Balance, Tripod Mounted, 18-55mm lens

Shiny Surfaces 6

Shiny Surface 7

D80,Aperture f/9.5, Shutter Speed 1/30 sec, ISO 100, 55mm (35mm equivalent 82mm),Pattern Weight Metering Mode, Flash White Balance, Tripod Mounted, 18-55mm lens

Shiny Surfaces 7

Shiny Surface 8

D80,Aperture f/9.5, Shutter Speed 1/30 sec, ISO 100, 55mm (35mm equivalent 82mm),Pattern Weight Metering Mode, Flash White Balance, Tripod Mounted, 18-55mm lens

Shiny Surfaces 8

Shiny Surface 9

D80,Aperture f/9.5, Shutter Speed 1/30 sec, ISO 100, 55mm (35mm equivalent 82mm),Pattern Weight Metering Mode, Flash White Balance, Tripod Mounted, 18-55mm lens

Shiny Surfaces 9


I can see that by moving the light around the cone that I can produce differing levels of contrast and that when the light is near to the cone that it overpowers the diffusing effect of the cone and it lights up everything including the background.

I can see that the cone is acting like an improvised light tent and that the cone is diffusing the light and not allowing it to concentrate in one area. Off all the images I produced on this exercise I prefer the lighting in the very first image as I feel that the image is neither over nor under exposed and that the amount of contrast is perfect for defining the cup.

Exercise 41 Concentrating Light

What: The main brief of this exercise was to make a covering for a light which would concentrate the light onto just part of a scene.
Where: Inside the house with the outside light blocked by blackout curtains.
When: During the evening.
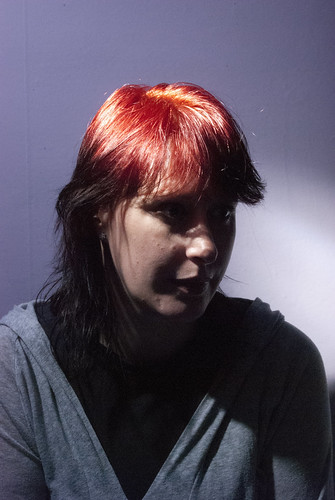
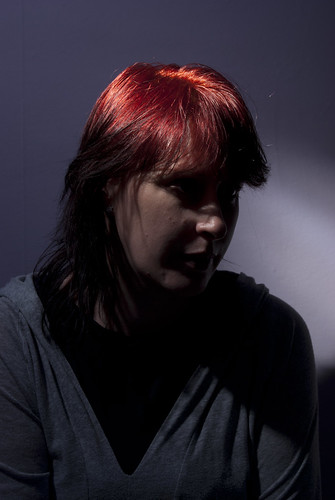
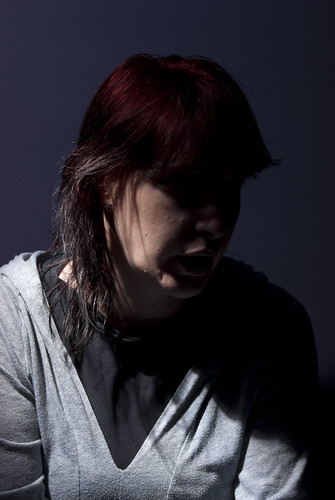
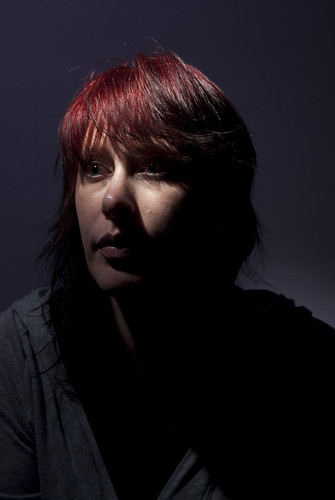
How: I first of all set up a studio flash and a rudimentary snoot to control the light but I found that the amount of light was still a little too much. So I then used a non diffused small standard camera flash head with a couple of A4 white paper sheets taped around the head. I then set the flash on top of a light stand and pointed the whole thing down towards my subject.
I then used a large piece of black card on the other side of my subject as a black flag as I did not want any light to be reflected back onto her.

Concentrating Light 1

D80,Aperture f/32, Shutter Speed 1/180 sec, ISO 100, 55mm (35mm equivalent 82mm),Centre Weight Metering Mode, Flash White Balance, Hand held, 18-55mm lens

DSC_0096

I like the way that the light just falls off and that only the top of her head and her shoulders are light by the flash. I also like the small shadows on her face as it helps to define the relief and shape.

Concentrating Light 2

D80,Aperture f/11, Shutter Speed 1/125 sec, ISO 125, 55mm (35mm equivalent 82mm),Centre Weight Metering Mode, Flash White Balance, Hand held, 18-55mm lens

DSC_0098

Moving the flash up slightly meant that the light was now being cast over her head and that only the top of her head would be light up. Here I was trying to replicate the portrait and fashion lighting of the 1930s and 1940s which is such an influence on me.


Concentrating Light 3

D80,Aperture f/13, Shutter Speed 1/125 sec, ISO 125, 55mm (35mm equivalent 82mm),Centre Weight Metering Mode, Flash White Balance, Hand held, 18-55mm lens

DSC_0102

Here I pointed the flash head down and forward as I wanted to drop her face into shadow. I wanted to see if I could just concentrate the light in front of her and try to silhouette her face.

Concentrating Light 4

D80,Aperture f/13, Shutter Speed 1/125 sec, ISO 125, 52mm (35mm equivalent 78mm),Centre Weight Metering Mode, Flash White Balance, Hand held, 18-55mm lens

DSC_0107

Keeping the light in the same position, I had her turn her face and move into the light, so that it passed over her face leaving her body unlight and in shadow. I am happy with this image as it has the effect that I was looking for, just concentrating the light enough so that only part of her face was light.

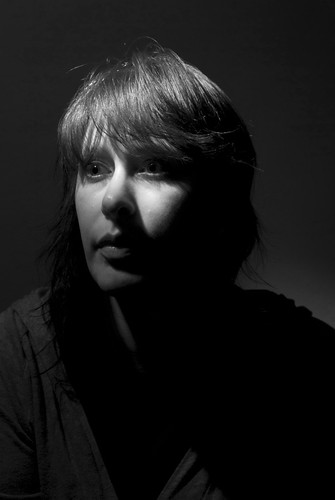
Concentrating Light 5 -  Monochrome with a Red Filter

D80,Aperture f/13, Shutter Speed 1/125 sec, ISO 125, 52mm (35mm equivalent 78mm),Centre Weight Metering Mode, Flash White Balance, Hand held, 18-55mm lens

DSC_0107 Monochrome - red Filter

Here I added a high contrast red filter and shot in black and white. The filter helped to diffuse the light and to bring out her eyes and the relief of her hair. It also helped to redefine the contrast of the image and created nice dark shadows.

I was pleased with this exercise as I really wanted to see if I could replicate the lighting style of images which fascinate me. I was happy to see that using a snoot allowed me to concentrate the light right down to almost pinpoint accuracy and that it can be used to project a beam of light onto the subject.

Exercise 40 Contrast and Shadow Fill

What: The main brief of this exercise was to take a number of photographs of a single subject where the light would be varied to demonstrate contrast and shadow fill.
Where: Inside the house with the outside light blocked by blackout curtains.
When: During the day.
How: I setup the still life with the camera locked off in a tripod pointing directly at the subject on the same level. I then started with a bare bulb flash and then worked through the exercise using a number of homemade reflectors and flags to demonstrate what happens to contrast and shadows when these items are used.

Up until now I had only really used a golden reflector and a black flag I had never tried to used white reflectors or silver reflectors, so I was interested in seeing what would happen.

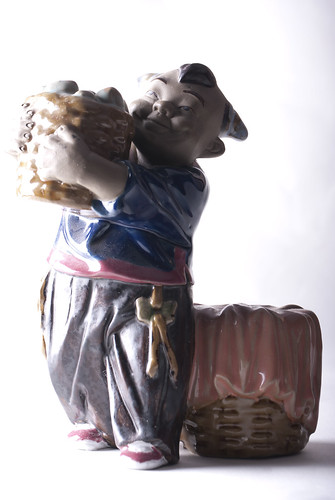
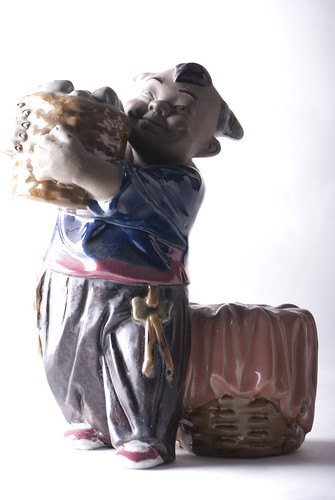
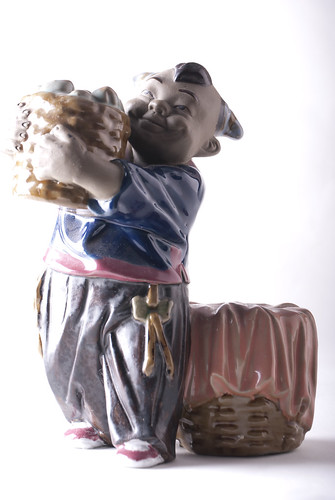
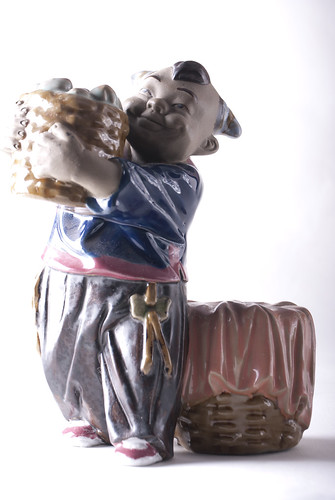
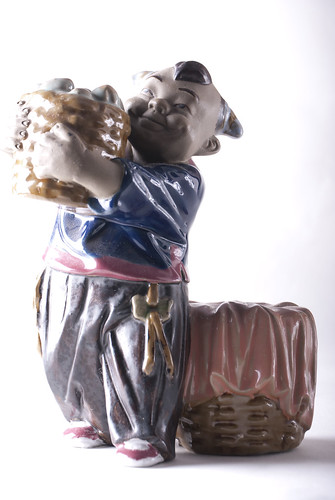
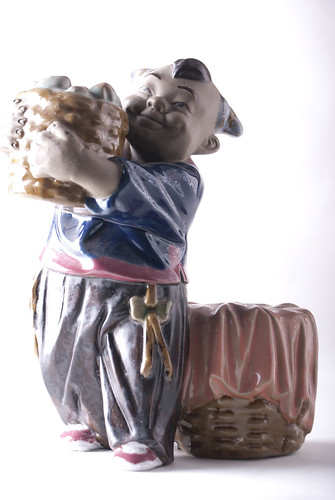
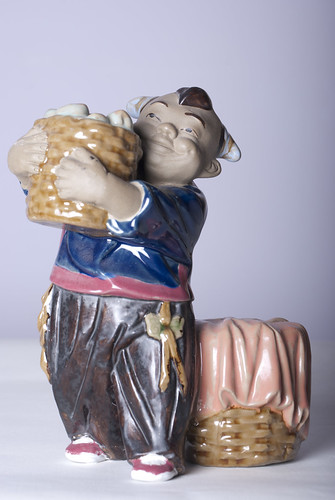
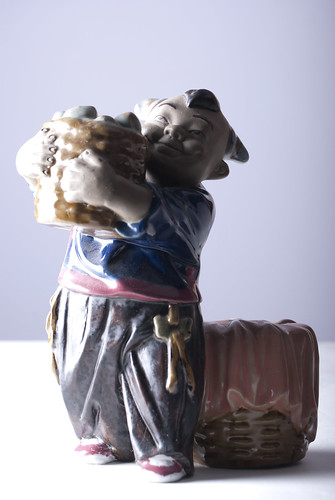
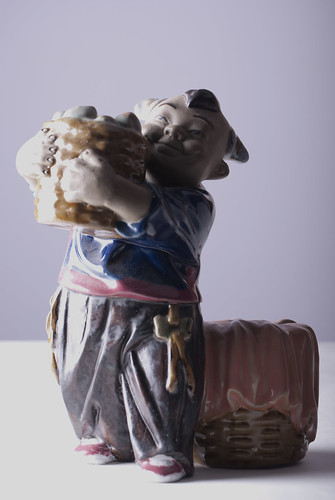
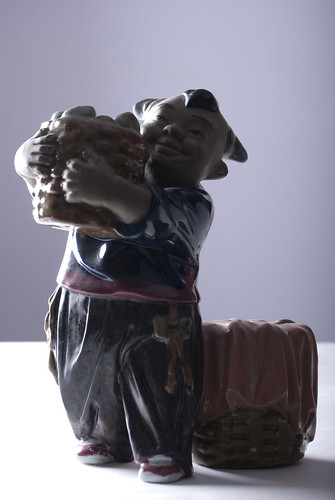
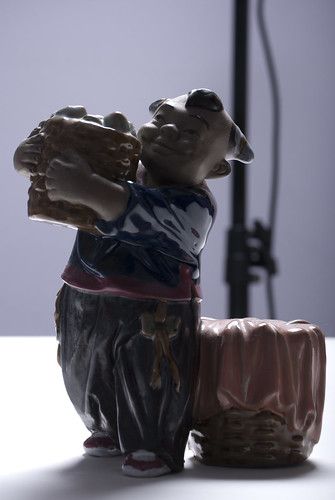
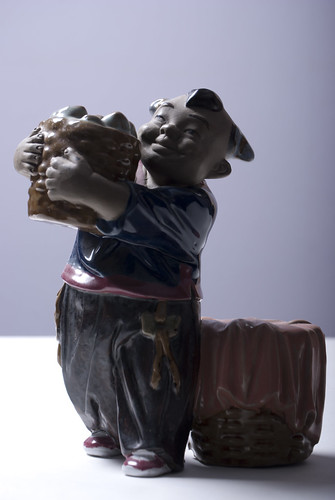
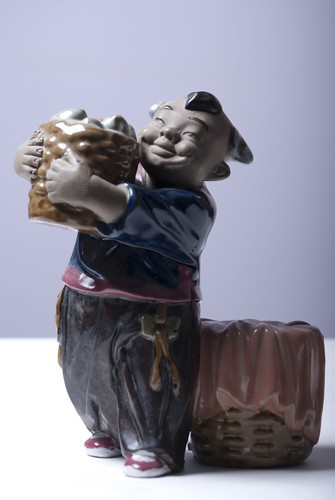
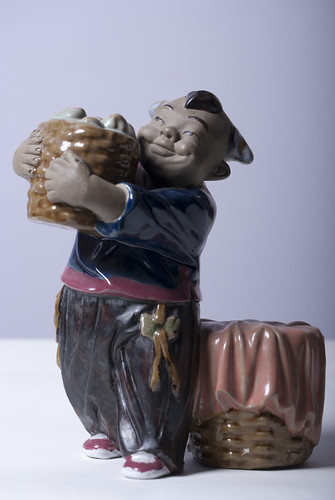
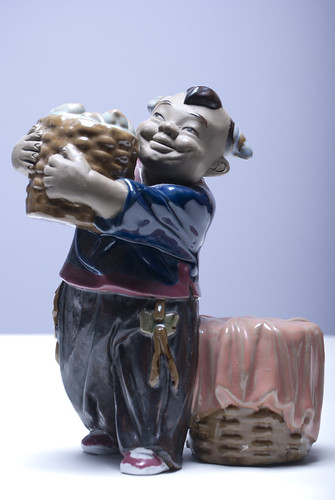
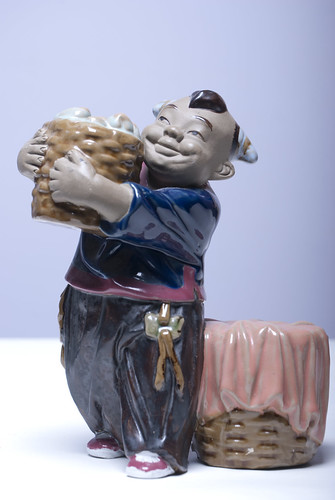
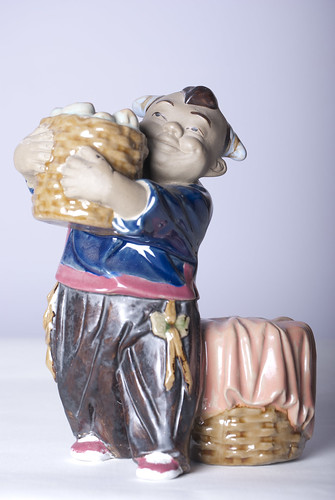
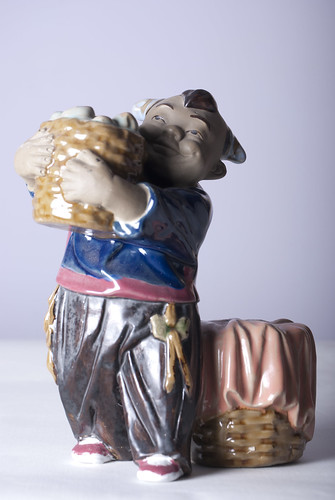
Again I went back to the small Chinese statue as I wanted something with a lot of relief but also with a little shine on it so that I could see what happens to the light as it is reflected back from the subject from the reflectors.

With the camera in a fixed position and the lighting in a fixed position at right angles to the camera and at the same level as the subject, the exercise asked me use different reflectors and to move them back and forward to demonstrate that the amount of light reflected back was dependant on the reflector and its distance from the subject.

Bare Bulb

D80,Aperture f/9.5, Shutter Speed 1/180 sec, ISO 100, 66mm (35mm equivalent 99mm), Pattern Metering Mode, Flash White Balance, Tripod Mounted, 55-200mm lens

Bare Bulb Flash

The first image is from a non diffused flash, just a bare flash bulb flash. I can see that there is a massive amount of light coming from the flash and it is overexposing the subject. The quality of light is hard to control in this case.

Diffused Flash

D80,Aperture f/9.5, Shutter Speed 1/180 sec, ISO 100, 66mm (35mm equivalent 99mm), Pattern Metering Mode, Flash White Balance, Tripod Mounted, 55-200mm lens

Difused Flash

With a white umbrella fitted in front of the flash to act as a diffuser, the amount of light is reduced and the image is not as overexposed as the bare bulb image. I can see that there is a greater amount of contrast and that the subject has regained some detail and definition. I can also see that the side facing the flash is brighter than the opposite side where little light can reach, as the subject is divided into two unequal parts.


White Card One Meter Away

D80,Aperture f/9.5, Shutter Speed 1/180 sec, ISO 100, 66mm (35mm equivalent 99mm), Pattern Metering Mode, Flash White Balance, Tripod Mounted, 55-200mm lens

White Card Meter Away

Using a large white card placed to the opposite side of the flash, I noted straight away that there was a certain amount of light reflected back into the subject. I can see areas, for example the sleeve on the statues which is now brighter and has less shadow on it as before. This has helped to balance the subject as it is no longer split down the middle with a light side and a dark side, the reflected light has filled in some of the shadows and helped to define the shape of the subject.


White Card Half a Meter Away

D80,Aperture f/9.5, Shutter Speed 1/180 sec, ISO 100, 66mm (35mm equivalent 99mm), Pattern Metering Mode, Flash White Balance, Tripod Mounted, 55-200mm lens

White Card Half Meter Away

Moving the card in to half the distance away brings in even more fill light. I was really pleased to see this effect and I was surprised that the Inverse Square Law also worked for reflected light. By halving the distance the amount of reflected light had filled in all the shadows and had reduced the overall contrast of the image as there are now less dark parts to the image. I liked this overall effect which I had to admit I would only have been able to produced before by the use of two lights and a certain amount of work to balance the amount of light from each one.

Foil Reflector Dull Side Out

D80,Aperture f/9.5, Shutter Speed 1/180 sec, ISO 100, 66mm (35mm equivalent 99mm), Pattern Metering Mode, Flash White Balance, Tripod Mounted, 55-200mm lens

Dull Side of Foil Out

Again I was surprised, I thought that a dull reflector would reflect less light than a white card; I was surprised to see that it reflected even more light, but with a slight different hue. The fill light this time was not white and in this case did not wash out the statue with light. I can see that there is a difference in the blue hue of the statues sleeve and that the contrast levels of the image have again been reduced slightly.

Foil Reflector Shiny Side Out

D80,Aperture f/9.5, Shutter Speed 1/180 sec, ISO 100, 66mm (35mm equivalent 99mm), Pattern Metering Mode, Flash White Balance, Tripod Mounted, 55-200mm lens

Shiney Side of Foil Out

Here things were as I expected, a lot of light was reflected back at the subject and the hue of the light is almost the same. I feel that the shadows are better defined and that the contrast of the image is better.

Crumpled Foil Reflector

D80,Aperture f/9.5, Shutter Speed 1/180 sec, ISO 100, 66mm (35mm equivalent 99mm), Pattern Metering Mode, Flash White Balance, Tripod Mounted, 55-200mm lens

Crumpled Foil

I was very surprised when I reviewed this image as I somehow expected that the amount of reflected light to be less. However the crumpled foil has caused a slight scattering of the reflected light and this has meant that the fill light is diffused and not as harsh as the shiny foil. I like the effect that this has produced as the subjects contrast is a lot better than before without making the shadows too dark, the shadows now are better defined and the hues of the subject are not as over exposed.


What I learned out of this exercise is that reflectors can be used to bounce light back at the subject and that all reflectors have different usages due to the quality of the reflected light. I shall try to use reflectors a lot more now and continue to experiment as I believe that there is not one answer as to which reflector to use in what situation.


Tuesday 9 August 2011

Exercise 39 The Lighting Angle

What: The main brief of this exercise was to take two a number of photographs of a single subject where the diffused light would be moved around the subject to light it from different angles.
Where: Inside the house, during the day with the outside light blocked by blackout curtains.
When: During the day.
How: I setup the still life with the camera locked off in a tripod pointing directly at the subject on the same level. I then started from position 1 which was in front of the subject beside the camera and after each photograph I then moved the light to the next described position.

This went a lot better as I was back on “safe” ground again, I was aware of what happens when you move a light around a subject .

Again I went back to the small Chinese statue as I wanted something with a lot of relief but also with a little shine on it so that I could see what happens to the light as it is reflected back from the subject.

Beside the Camera

With the light sitting on the left of the camera at the same level as the subject and the camera, pointing directly at the subject.

D80,Aperture f/11, Shutter Speed 1/180 sec, ISO 100, 62mm (35mm equivalent 93mm), Pattern Metering Mode, Flash White Balance, Tripod Mounted, 55-200mm lens

Front

I can see that some of the light has been reflected directly back into the lens from the shiny parts of the subject and that both sides of the subject receive almost equal amounts of light.

Front Left

With the light still in front of the subject and to left of the camera at the same level as the subject and the camera, pointing directly at the subject.

D80,Aperture f/9.5, Shutter Speed 1/180 sec, ISO 100, 62mm (35mm equivalent 93mm), Pattern Metering Mode, Flash White Balance, Tripod Mounted, 55-200mm lens

Front Left

Here the subject is divided into two unequal parts, spilt by the amount of light that they are receiving, the face behind the basket is now at lot darker and there is a higher amount of contrast in the image. I can also see that some of the subject is now washed out with too much light. An adjustment of the aperture would have helped to prevent this from happening.

To the Side

With the light at the side of the subject and off to the left of the camera and at the same level as the subject and the camera, pointing directly at the subject .

D80,Aperture f/9.5, Shutter Speed 1/180 sec, ISO 100, 62mm (35mm equivalent 93mm), Pattern Metering Mode, Flash White Balance, Tripod Mounted, 55-200mm lens

Left

Again the subject is almost split in two, with one light side and one dark side. This throws a lot of the statue into relief and brings out the three dimensions of the statue.

Rear Left

With the light at the rear of the subject and off to the left of the camera and at the same level as the subject and the camera, pointing directly at the subject .

D80,Aperture f/9.5, Shutter Speed 1/180 sec, ISO 100, 62mm (35mm equivalent 93mm), Pattern Metering Mode, Flash White Balance, Tripod Mounted, 55-200mm lens

Rear and to the Left

To the Rear

With the light behind the subject pointing towards the camera and at the same level as the subject and the camera, pointing directly at the subject.

D80,Aperture f/22, Shutter Speed 1/180 sec, ISO 100, 62mm (35mm equivalent 93mm), Pattern Metering Mode, Flash White Balance, Tripod Mounted, 55-200mm lens

Directly Behind

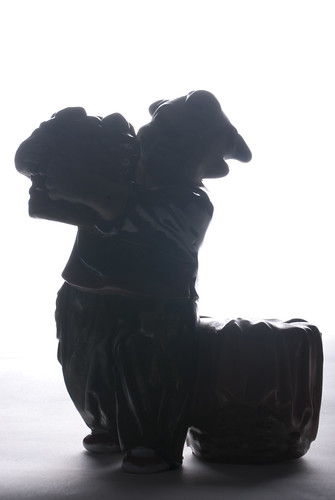
This creates a silhouette of the subject.

Above and to the Rear

With the light high above the subject pointing down towards the subject while the camera remains in position at the same level as the subject and pointing directly at the subject.

D80,Aperture f/9.5, Shutter Speed 1/180 sec, ISO 100, 62mm (35mm equivalent 93mm), Pattern Metering Mode, Flash White Balance, Tripod Mounted, 55-200mm lens

High and Rear

This is almost like a hair light, where the subject is light from above with the majority of the light being thrown on the hair of the subject. This helps to define the top of the subject without it being blown out by too much light. It also helps to define the shape of the subject. I like this type of lighting as I feel is produces a nice quality of light which is not harsh and it helps to create a wide high level of contrast.

Above, to the Rear and to the Left

With the light still to the rear of the subject it is high above the subject and is pointing down towards the subject while the camera remains in position at the same level as the subject and pointing directly at the subject.

D80,Aperture f/9.5, Shutter Speed 1/180 sec, ISO 100, 62mm (35mm equivalent 93mm), Pattern Metering Mode, Flash White Balance, Tripod Mounted, 55-200mm lens

High and Rear Left

I feel that this final image is a little dark and the edges of the subject are a little harsh on the side which has been light. The other side of the subject is still quite dark but again it has not lost any definition as the light is still able to reach it

Above and to the Left

With the light high above the subject and is pointing down towards the subject from the left while the camera remains in position at the same level as the subject and pointing directly at the subject.

D80,Aperture f/9.5, Shutter Speed 1/180 sec, ISO 100, 62mm (35mm equivalent 93mm), Pattern Metering Mode, Flash White Balance, Tripod Mounted, 55-200mm lens

High and Left

Again this produces which I feel is a nice quality of light, the subject is not over bright and the shapes and colours of the subject are well defined

Above and to the Front Left

With the light high above the subject and is pointing down towards the subject from the front left while the camera remains in position at the same level as the subject and pointing directly at the subject.

D80,Aperture f/9.5, Shutter Speed 1/180 sec, ISO 100, 62mm (35mm equivalent 93mm), Pattern Metering Mode, Flash White Balance, Tripod Mounted, 55-200mm lens

High and Front Left

I think this is probably the best of the lot so far, it is not too bright and it is not too dark, there are little to no reflections from the subject and it is well defined and its’ shape has been brought out well.

Above and to the Rear

With the light directly above and slightly behind the subject and is pointing down towards the subject from above the camera while the camera remains in position at the same level as the subject and pointing directly at the subject.

D80,Aperture f/9.5, Shutter Speed 1/180 sec, ISO 100, 62mm (35mm equivalent 93mm), Pattern Metering Mode, Flash White Balance, Tripod Mounted, 55-200mm lens

Above and to the rear

This has a lot of contrast and shadow in this image, I can see the shadow created by the light on the ground. I am unsure as how to feel about this as although I like the lighting I am not sure about some of the relief that the lighting has created within the statue itself.

Above

With the light directly above the subject and is pointing down towards the subject from above the camera while the camera remains in position at the same level as the subject and pointing directly at the subject.

D80,Aperture f/9.5, Shutter Speed 1/180 sec, ISO 100, 62mm (35mm equivalent 93mm), Pattern Metering Mode, Flash White Balance, Tripod Mounted, 55-200mm lens

Directly Above

I was surprised to see how cold an image this produced, there appears to be a sharp blue hue to the light and this has produced a low contrast image with little shadow. Again I can see that some parts of the subject are better defined that others.

Above and to the Front

With the light directly above and slightly in front of the subject and is pointing down towards the subject from above the camera while the camera remains in position at the same level as the subject and pointing directly at the subject.

D80,Aperture f/9.5, Shutter Speed 1/180 sec, ISO 100, 62mm (35mm equivalent 93mm), Pattern Metering Mode, Flash White Balance, Tripod Mounted, 55-200mm lens

Above and to the front

I was again surprised by this final image as I expected it to be washed out with high bright whites and little contrast. I was surprised to see that the subject was well defined and that it produced what I think is the best image for this subject. Here the light has filled in the shadows seen in the last image and now there are almost no shadows in the image. This is a nice representation of the subject and I like the light in this image.

I have learned a lot on this exercise as I can now see what the effect of light is on a subject depending on the placement of the light. I can also see that I can use the light to create better definition of the subject depending on where I place the light. I can also see how a combination of lights in differing locations could be used to create a well defined image with good definition and contrast.


Exercise 38 Softening the Light

What: The main brief of this exercise was to take two photographs one where the subject was light by a bare bulb or flash and the second where the same subject was light by a diffused bulb or
Where: Inside the house, during the day with the outside light blocked by blackout curtains.
When: During the day.
How: I setup the still life with a flash off to one side, photographed once with the bare light and then with the diffused light.

This did not go as expected as the first time I did this exercise the light from the studio light was so bright that there was little difference between the two photographs. I took several days trying to find the little differences between the two images before abandoning the idea and starting again.

The second time I used a small square desktop white box to diffuse the light through one side of the box, this two failed as again the difference between the two photographs was negligible.

I then decided to use less light and I tried a small flash head remotely triggered off camera. While this light up the subject the differences were little due to the fact that the white box was diffusing the light too much.

Finally using the same white box I took off one side and using the same small flash head I took a number of photographs until I was reasonably happy with the bare bulb result. I could still see a lot of white burnout, but at least I could see the subject clearly, I then used a disposable paper tissue to cover the head of the flash to diffuse the light. This work and I could finally see the difference between the two images.

The first attempt.

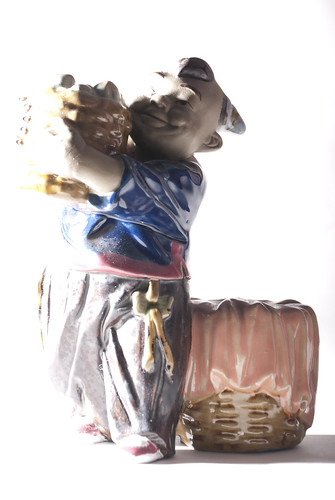
A small china statue given to us a long time ago; It is quite wide and long and so I thought that as it had a lot of relief that it would be a good subject.

Bare Bulb

D80,Aperture f/9.5, Shutter Speed 1/180 sec, ISO 100, 62mm (35mm equivalent 93mm), Pattern Metering Mode, Flash White Balance, Tripod Mounted, 55-200mm lens

Bare Flash

Diffused Bulb

D80,Aperture f/9.5, Shutter Speed 1/180 sec, ISO 100, 62mm (35mm equivalent 93mm), Pattern Metering Mode, Flash White Balance, Tripod Mounted, 55-200m lens

Soft Box Difused Flash

While I can see a difference in the levels of light and contrast I was surprised to see that the diffused bulb had darker shadows and that it had a larger overall contrast range to the subject. I also fell that the bare bulb image is almost too washed out with light. Trying to control a light that powerful was quite a bit difficult in such a small room.

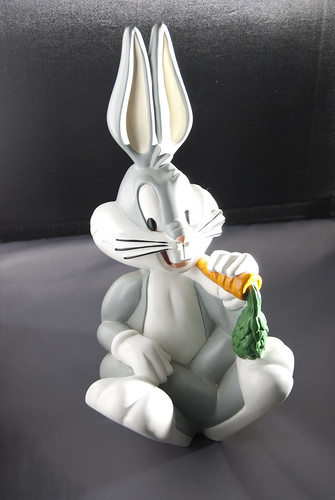
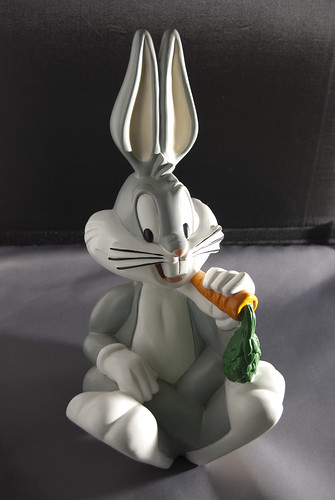
The Bugs Statue

I changed my mind at tried this out in the end. As the statue itself has a lot of curves and straights on it I thought that I may be better to spot the contrast differences between the two images.

Bare Bulb Bugs

D80,Aperture f/8.0, Shutter Speed 1/180 sec, ISO 100, 40mm (35mm equivalent 60mm), Pattern Metering Mode, Flash White Balance, Tripod Mounted, 18-55mm lens

Bugs Bare Flash - Flash wb

Diffused Bulb Bugs

D80,Aperture f/8.0, Shutter Speed 1/180 sec, ISO 100, 40mm (35mm equivalent 60mm), Pattern Metering Mode, Flash White Balance, Tripod Mounted, 18-55mm lens

Bugs Difused Flash - Flash wb

This time I can see a lot more contrast in the shadows of the ears, face and feet of the statue.

What I learned out of this exercise is that softening the light is not always the solution to every problem, while it can create a great deal of contrast within an image, it can also create a situation where the final image may lose some of its detail.

However when there is too much light or the light being used creates shadows and light which are too hard and too sharp then these can be softened by the use of scrim or soft boxes to create a flatter softer light which is not as harsh or has too much contrast.


Photographic Lighting

This is an area that I am quite confortable in; I like using photographing lighting to produce unusual and eyecatching images. I am heavily influenced by the filn makes of the 1930s and 1940s as well as the magazine photographers of the time; photographers like Lee Miller; Leonard McCombe, Eliot Elisofon who had a lot of his ground breaking photography featured in Life magazine.
One of the main "high" fashion photographers of the time was Edward Steichen whos' work was featured regularly in Vogue magazine.

Tuesday 2 August 2011

Exercise 37 - Outdoors at Night

What: The main brief of this exercise was to take between twelve and twenty photographs where the subject or areas were light mainly by artificial light. The brief allowed foe outside images to be taken as long as the flood lights lighting up the subject were not easily seen in the image or were obscured completely. The brief also allowed for a number of photographs to be taken inside a building where there was no natural light at all but not using a tripod.
Where: Outside over the main road, in a graveyard, outside a hotel, inside a newly refurbished museum and in a moving car.
When: Mainly at night, although I had seen a number of press and news images of the galleries of the refurbished museum and I knew that they would be suitable at any time of the day.
How: I used a number of setups ; Over the main road I had the camera mounted on a tripod with the head locked off. In the Graveyard I again used the tripod. Inside the museum I stuck to the brief and just hand held the camera. Inside the car I used a combination of hand held and a Delkin “Fat Gecko” suction mounted tripod (See http://delkin.com/i-5829837-fat-gecko-original-dual-suction-camera-mount.html) for more details on the mount.

I had also done a little extra research into photographing neon lights at http://www.popphoto.com/how-to/2010/10/how-to-shoot-neon-lights just in case I came across any but alas I did not.

Main Road

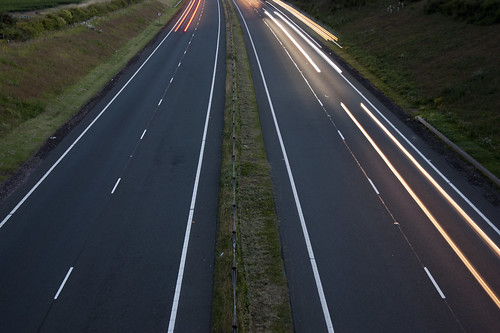
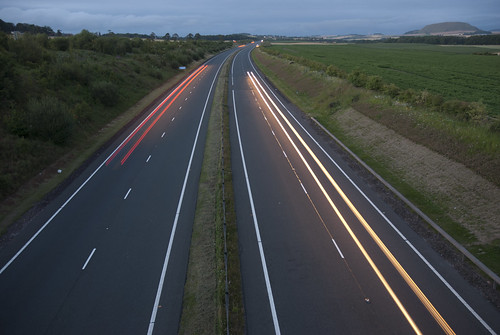
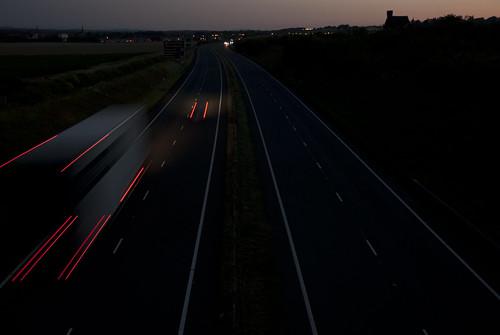
The position that I scouted is a bridge over a long dual carriageway which acts as the main road. I positioned myself in the middle of the bridge and waited for some traffic to arrive. Unexpectedly I found it to be quite a quiet time and I had to wait a while before I saw any traffic at all. I had set the camera to ISO 100 so that I would be able to obtain the light trails from the moving vehicles and I had also set the white balance to shade as it captured the hues to the best representation.

Car Headlights One

D80,Aperture f/4, Shutter Speed 4 sec, ISO 100, 18mm (35mm equivalent 27mm), Pattern Metering Mode, Shade White Balance, Tripod Mounted, 18-70mm lens

car headlights one

I was please to see that the sky had almost the same colours as it had before the sun set and that the green hue of the fields was nicely defined. I like the composition of the image as the lights attract your eye and then draw them off into the distance along the path of the road.

Car Headlights Two

D80,Aperture f/3.8, Shutter Speed 0.3 sec, ISO 100, 29mm (35mm equivalent 43mm), Pattern Metering Mode, Shade White Balance, Tripod Mounted, 18-70mm lens

car headlights two

I moved the camera over to the other side of the bridge which looked towards where the sun had set. I was surprised to find that there was still a lot of light in the sky and that I had to adjust the shutter speed to 0.3 of a second. While I achieved getting both the shape of the vehicle and the tail of the lights I find the final image a little on the dark side compared to the first image where the surrounding were light up more and the image composition was balanced more.

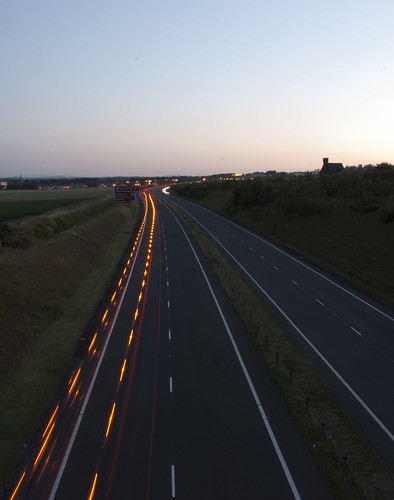
Car Headlights Three

D80,Aperture f/3.8, Shutter Speed 3 sec, ISO 100, 29mm (35mm equivalent 43mm), Pattern Metering Mode, Shade White Balance, Tripod Mounted, 18-70mm lens

I recomposed the image and waited a little longer for some traffic before taking this image. This time the colours and composition balance. I still was not happy and so took another image.

car headlights three


Car Headlights Four

D80,Aperture f/22, Shutter Speed 25 sec, ISO 100, 18mm (35mm equivalent 27mm), Pattern Metering Mode, Shade White Balance, Tripod Mounted, 18-70mm lens

I adjusted the aperture to f/22 as I wanted quite a long exposure time and I wanted to capture the sky and the surroundings of the road. As the aperture was at f/22 I made the shutter speed 25 seconds. This allowed me to wait on the slow moving tractor with its flashing amber beacon and allow it to move past.

Car Headlights four

I am very happy with this final image as the dotted effect of the flashing amber beacon has created an unusual light trail and an unusual image.

Graveyard

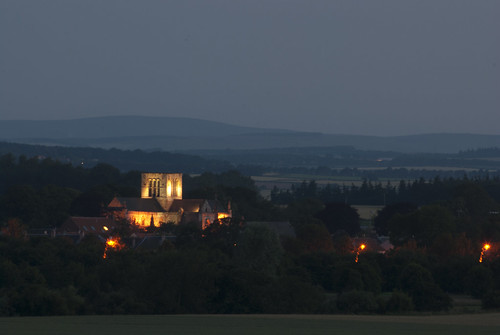
Just as I was moving off the bridge I noted that the lights on the one floodlight building around were on. I took the first image from the edge of the bridge pointing down towards the building using a telephoto lens.

Church Light Up from a Distance

D80,Aperture f/22, Shutter Speed 3 sec, ISO 100, 270mm (35mm equivalent 405mm), Pattern Metering Mode, Shade White Balance, Tripod Mounted, 70-300mm VR lens

Church light up from a distance

Again I like the way that it looks almost like daytime, the orange of the floodlights balances against the green of the fields and the blue of the sky.

Church Light Up One

I moved down into the graveyard beside the church and took this image of the building positioned at the edge of the path a little way in from the front gate. I had to move around to find a position where I could photograph the church without being blocked by a gravestone, a bush or a tree.

D80,Aperture f/22, Shutter Speed 30 sec, ISO 100, 40mm (35mm equivalent 60mm), Pattern Metering Mode, Fluorescent White Balance, Tripod Mounted, 18-70mm lens
Church Light Up one

I changed the white balance to fluorescent as I noted that the lights on the building were very orange close up and that if I had not adjusted the white balance I would have ended up with an over warm image where it would have been washed out by an orange hue. I like the colour of the sky as it is a dark midnight blue and at the same time I managed to capture the colours of the stain glass window and not allow it to be too over or under exposed.

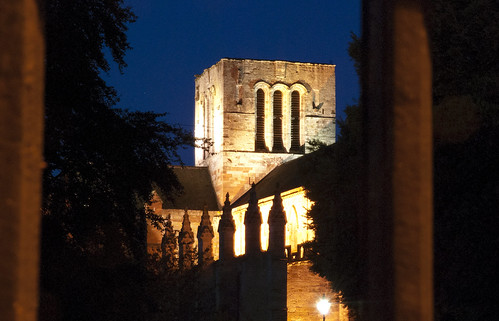
Church Light Up Two

I moved outside the grounds to the church in an attempt to get another composition of the church and its lighting. In the end I positioned myself close to the ground and moved the tripod down to my level; from there I could photograph the tower of the church between the railings on the wall.

D80,Aperture f/27, Shutter Speed 10 sec, ISO 100, 70mm (35mm equivalent 105mm), Pattern Metering Mode, Fluorescent White Balance, Tripod Mounted, 18-70mm lens

Church through the railings looking at the side of the church as it has less light

I then cropped the final image as I had too much dead space on the right of the frame which was detracting from the composition. At this angle I noted that the lights were less orange and whiter and that the lights from the church would silhouetted the trees on either side of the frame.

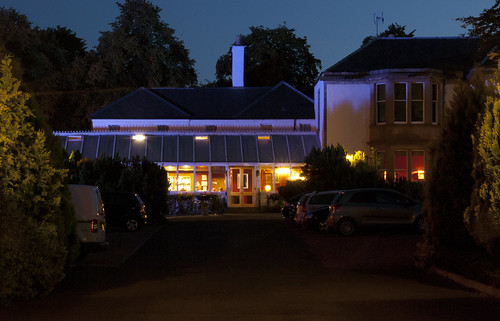
Hotel Light Up in Blue

Opposite the church is a hotel which was floodlight in blue. I moved to the very edge of the property and shot down the driveway and between the bushes that bordered the driveway. I noted that there was a combination of blue floodlights and yellow internal lights

D80, Aperture f/27, Shutter Speed 20 sec, ISO 100, 56mm (35mm equivalent 84mm), Pattern Metering Mode, Tungsten White Balance, Tripod Mounted, 18-70mm lens

Hotel from outside blue lights on the front of the building

I decided to use Tungsten white balance as I thought that the fluorescent white balance would create a very cold blue hue and I wanted to capture the warmth of the internal lights as well as the light blue hue of the floodlights. Examining the image later I can see that the lights almost split the building in two horizontally; the lower half being the warm orange of the internal decorations against the tungsten lights and the upper half being the colder blue of the floodlights. Again I was pleased to see that I had managed to get an exposure where I could balance the internal and the external lights and not over or under expose either.

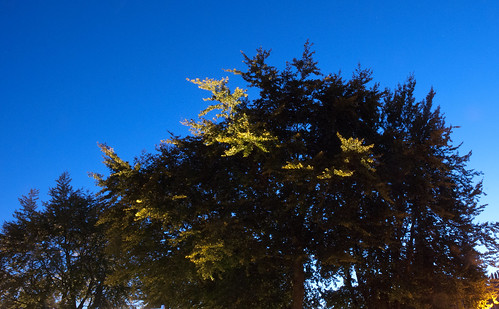
Trees Light From Below

Just outside the hotel was a floodlight sign, and as I moved away from the building I could see that there was an overspill of light from the triangular shaped sign and that it was being reflected up into the tree leaves above the sign. I liked the differing colours caused by the spill of light so I set up the tripod across the road from the trees and shot up into the leaves.

D80, Aperture f/22, Shutter Speed 30 sec, ISO 100, 18mm (35mm equivalent 27mm), Pattern Metering Mode, Fluorescent White Balance, Tripod Mounted, 18-70mm lens

Trees light from below by lights from sign

I then cropped the final image as I had managed to capture a orange street light in the composition. I like the composition of this image as it has both a silhouetted tree and the branches leaning out of the darkness into the bright light.

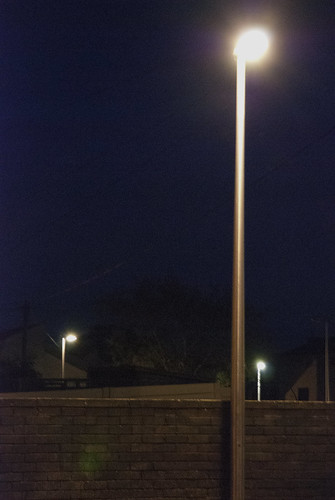
Street Light

As we parked up home again I decided to take an image of a street light, something which I had struggled with previously. While not strictly within the brief I wanted to see if I could capture the correct hue of light from the street light.

D80, Aperture f/4.5, Shutter Speed 1/6 sec, ISO 3200, 70mm (35mm equivalent 105mm), Pattern Metering Mode, Fluorescent White Balance, Tripod Mounted, 18-70mm lens

Street Lights

While it was better than I had managed before I think I could do better.

Moving Car

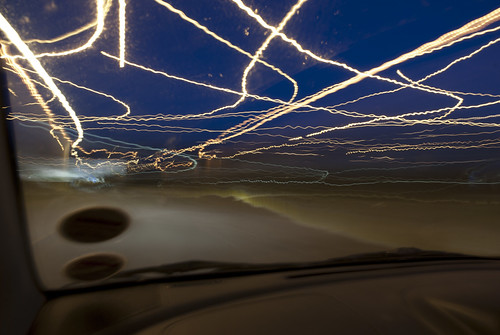
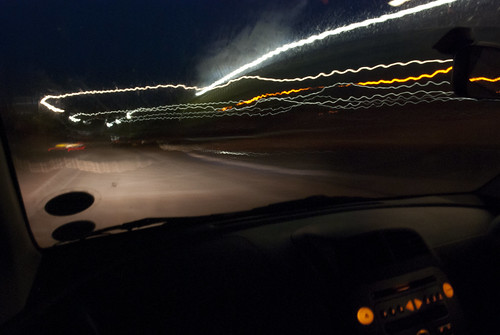
Due to my eye condition I do not like to drive at night as I almost have to have my eyes closed at times to protect them from the headlights of other vehicles. I noticed that if I squinted enough the all the street lights and other car lights just became blobs and streaks of light.

Having bought a Delkin mount to use with my previous car, I took it with me when Lindsay was driving me from location to location for this exercise. I mounted it on the passenger window and set the camera up so that I could capture light trails through the windscreen of the car.

Moving Car One.

D80, Aperture f/19, Shutter Speed 20 sec, ISO 100, 18mm (35mm equivalent 27mm), Pattern Metering Mode, Tungsten White Balance, Tripod Mounted, 18-70mm lens

I realised that the windscreen had a slight tint to it so I set the white balance to Tungsten as even today a lot of cars still use tungsten bulbs as their main source of light.

Moving Car - inside the car one

I am very pleased with this image as the light trails really do indicate the movement of the car from my position as a passenger. It is strange to see the many different hues and types of light used, as I managed to capture street lights, car lights, traffic lights and reflected light from buildings.

Moving Car Two

I decided to repeat the shot again, but moved the camera and mount to a different position closer to me in the car, so that I was practically looking out through the viewfinder as we moved.

This time as the camera was closer to me, it received a little more support and it did not vibrate as much. I wanted less of an exposure time so I adjusted the ISO to ISO1000 and set the shutter speed at 6 seconds.

D80, Aperture f/22, Shutter Speed 6 sec, ISO 1000, 18mm (35mm equivalent 27mm), Pattern Metering Mode, Fluorescent White Balance, Tripod Mounted, 18-70mm lens

Moving Car - inside the car two

Even though there are less light trails I like the sine wave that the movement of that the car set up as it moved over a rather uneven patch of road.

Inside the Museum

Having seen the refurbished museum on the news I decided that it would be ideal for this exercise as there were a number of locations inside the museum which now had no natural light at all.

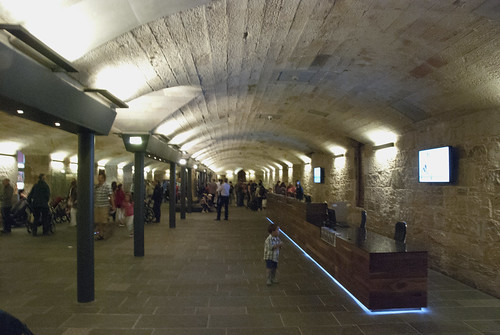
On entering the museum I found the first location which was a vault like structure which was the ground floor storage area underneath the entrance to the museum.

It was very brightly lit to make it attractive and welcoming to visitors with a number of different lighting styles.
Looking at the colours of the stone and the setup of the lights I decided on tungsten white balance as otherwise the image would have a darker yellow hue to it which detracted from the beauty of the building.

D80, Aperture f/16, Shutter Speed 1/6 sec, ISO 3200, 18mm (35mm equivalent 27mm), Pattern Metering Mode, Tungsten White Balance, Hand Held, 18-70mm lens

Inside Cavern Space

It was quite difficult to get a successful hand held shot in such low light conditions, I had to go to the maximum ISO on the camera to allow me to achieve hand held speeds.

Inside the Science Hall

I moved into the back of the museum where they have blocked off all the light coming in through the Victorian arched iron roof and due to the set up of the walls all natural light is blocked off from entering the hall. The main light for the hall comes from the walls and from the exhibition display cabinets.

D80, Aperture f/4.8, Shutter Speed 1/8 sec, ISO 3200, 18mm (35mm equivalent 27mm), Pattern Metering Mode, Fluorescent White Balance, Hand Held, 18-70mm lens

Inside museum with no external lighting two

Inside the Science Hall Two

I recomposed the image just to capture the ground floor layout and the lights coming from the exhibition display cabinets only

D80, Aperture f/4.8, Shutter Speed 1/45 sec, ISO 3200, 18mm (35mm equivalent 27mm), Pattern Metering Mode, Fluorescent White Balance, Hand Held, 18-70mm lens
Inside museum with no external lighting

I noticed that there was a lot more light coming off the display cabinets as I needed a faster shutter speed although all I had done was point the camera directly into the room. I can also see that the exhibition display are not so over exposed and that you can now easily see what is in the cabinets.

Inside the Cultural Hall

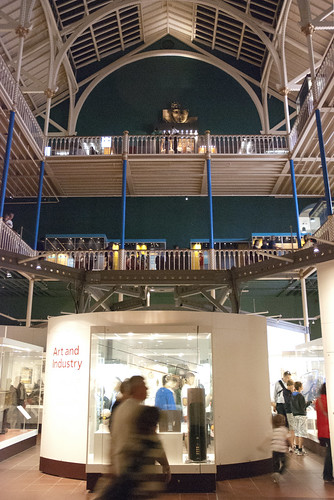
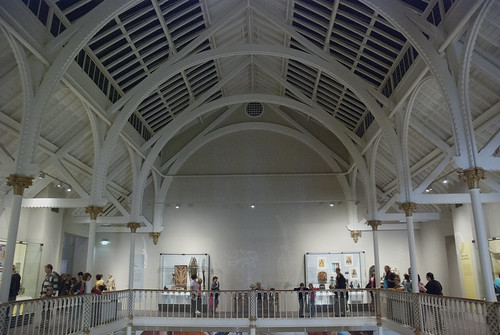
I then moved up to the top of the museum and went into the cultural gallery where again like the science gallery the natural light has been removed by blocking up the windows and the roof. I wanted to capture the shape of the roof as well as the limited amount of light in the gallery

D80, Aperture f/4.8, Shutter Speed 1/15 sec, ISO 3200, 18mm (35mm equivalent 27mm), Pattern Metering Mode, Tungsten White Balance, Hand Held, 18-70mm lens

Inside museum with no external lighting three

A lot of this area is light up using LED lighting which lends itself to tungsten white balance as depending on the colour of the LEDs it can produce a light which is almost the same colour temperature as tungsten.

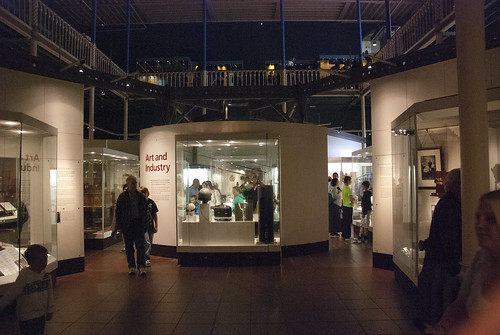
Inside the Cultural Hall Two

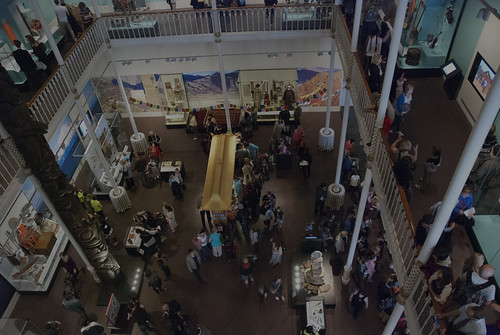
Looking down into the crowded gallery below I noticed that there was a number of different light sources and that the light was coming from all directions. Again I went for tungsten white balance as it made for the best compromise in colour temperature for the whole gallery.

D80, Aperture f/4.8, Shutter Speed 1/15 sec, ISO 3200, 18mm (35mm equivalent 27mm), Pattern Metering Mode, Tungsten White Balance, Hand Held, 18-70mm lens

Inside museum with no external lighting four

This has been quite a hard exercise to perform as I found it difficult to find the right lighting conditions for each circumstance. I took a number of images where the white balance did not work out, the shutter speed was incorrect causing over and under exposure.

I was really out of my comfort zone for many of these images as I had to go complete manual mode and at times work out in my head what would be the right exposure time for the image. I’m pleased to say that I did not panic and I just took a few extra seconds to work out what I wanted before setting the camera up.

Again I have learned that there is a great difference in the colouration of artificial light and that I can use the cameras white balance to correct the image where the final result would end up being too cold or to warm due to the tints and hue caused by the incorrect white balance. I was pleased to find that I could obtain the correct white balance through practice and that during the exercise I was able to set the correct white balance before taking an exposure.

What I was really pleased to find was that I was successful in obtaining a few images which although they had been taken after sunset still appeared as if they had been taken during the day; this was particularly pleasing as I have been trying to obtain this affect after being influenced by some of the photographers and their photographs in http://gizmodo.com/5742383/175-photos-of-day-taken-at-night